|
I made a version of this last year for myself. I’ve expanded on it since then, making it possible to choose the colors of your cabinets, counters, hardware, accessories, and appliances. (You know I only make mods to make my games prettier. Can’t stop decorating, even virtually!) Set different combinations for your farmhouse, the upgraded cabins, and the island house. Go get yourself a Lovely Kitchen! 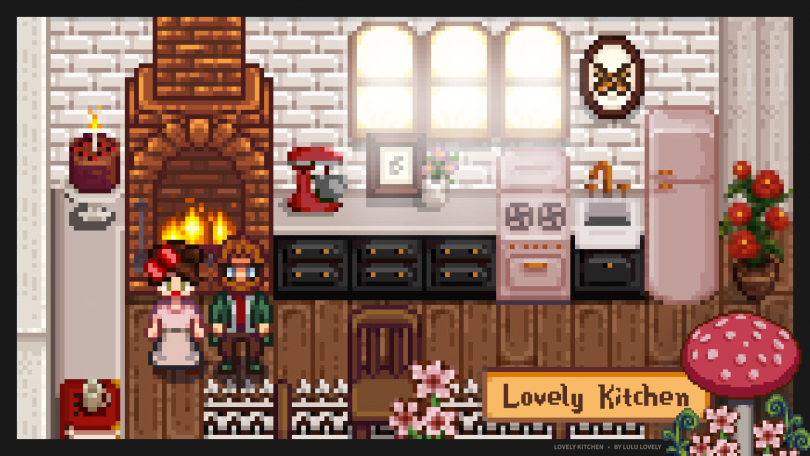
There are 12 cabinet colors: gray, pink, birch, white, mint, green, walnut, cream, sky, blue, oak, and black. 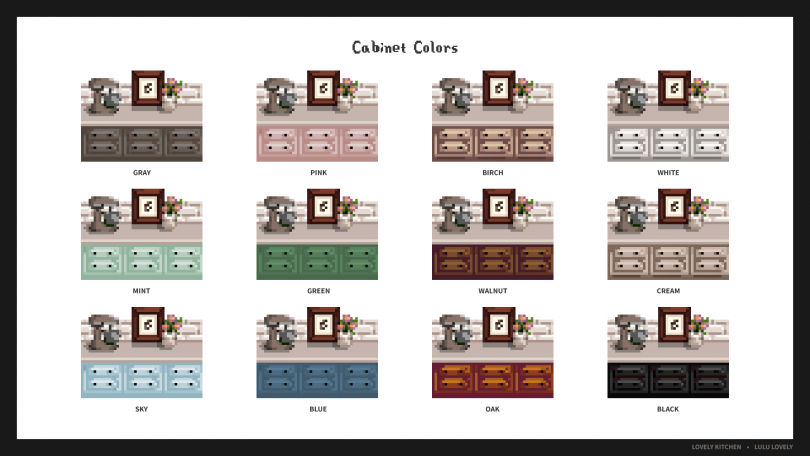
Appliances come in pink, sky, mint, white, cream, stainless steel, and copper. 
The counters are available in light, medium, and dark versions. Add a stand mixer and book in blue, green, neutral, pink, or red. Hardware (cabinet knobs, appliance knobs, and the sink faucet) comes in red, blue, silver, nickel, bronze, black, gold, or brass. 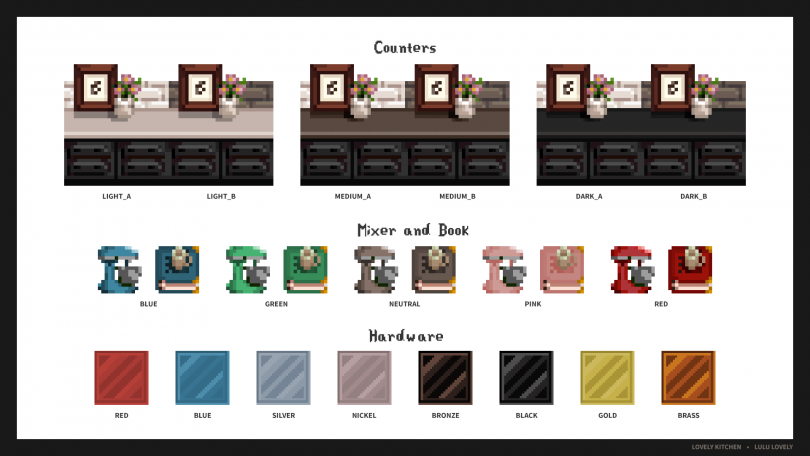
Lots of ways to mix and match to customize your kitchen as you like! 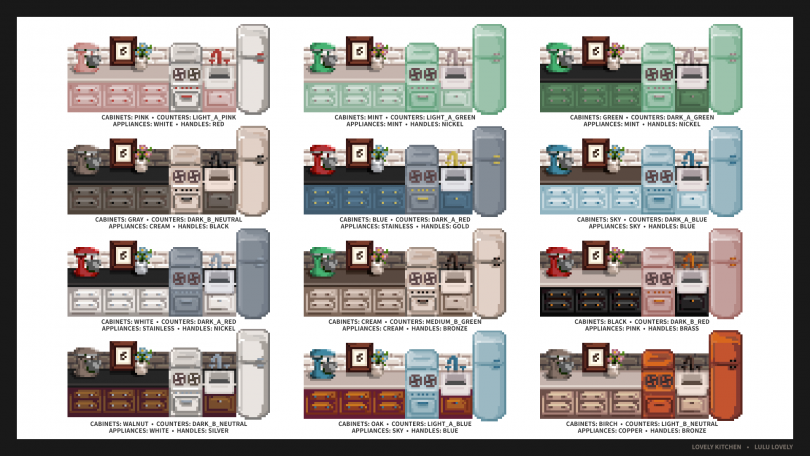
I’m partial to the options with pink (of course), but I tried to make it versatile enough to work with lots of styles and preferences. 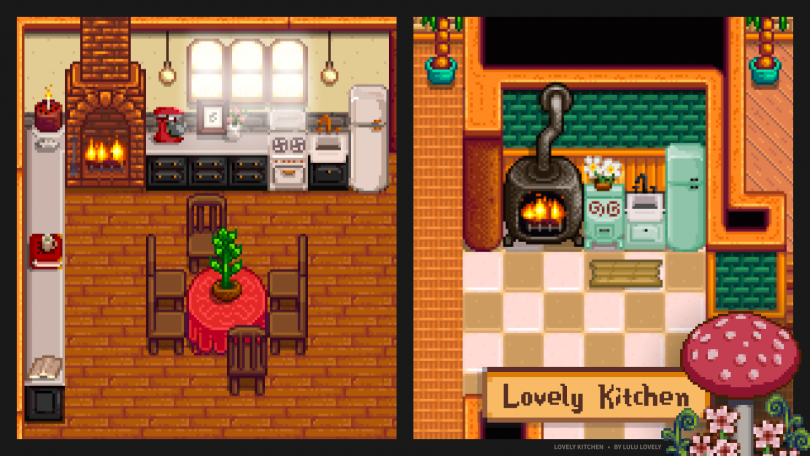
The examples above show Lovely Kitchen as the only mod. Below is my personal house with a bunch of cobbled-together assets from other creators in addition to my own work. 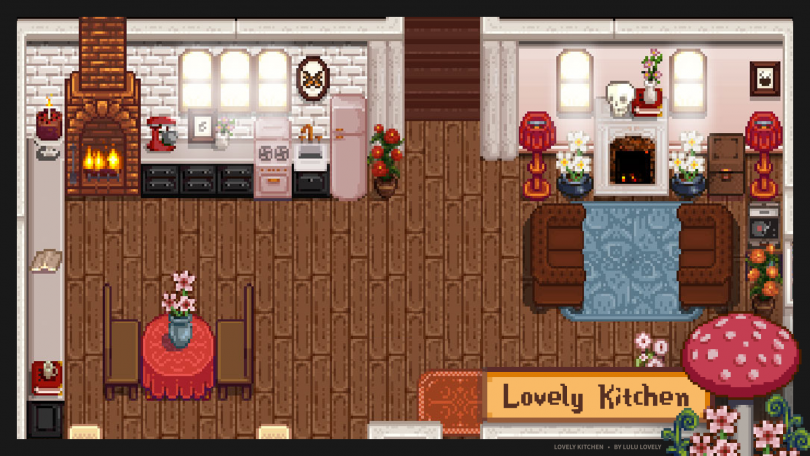
I hope you have as much fun with it as I have! Download→ My Lovely Kitchen mod for Stardew Valley is free to download on Nexus Mods. Lovely Coffee MakerI added a coffee maker replacement as un update to my Lovely Kitchen mod, but it’s also available as a standalone if you have a different kitchen you already like. At some point I’d like to make a mini fridge replacement that turns them into a modular pantry (at least visually). No idea on release dates moving forward since it’s just something I do after the kids are in bed and I feel like making some pixel art or coding. The challenge of making something recognizable that’s 16 pixels wide and fits the game aesthetic is just too much fun. → My Lovely Coffee Maker mod for Stardew Valley is free to download on Nexus Mods. 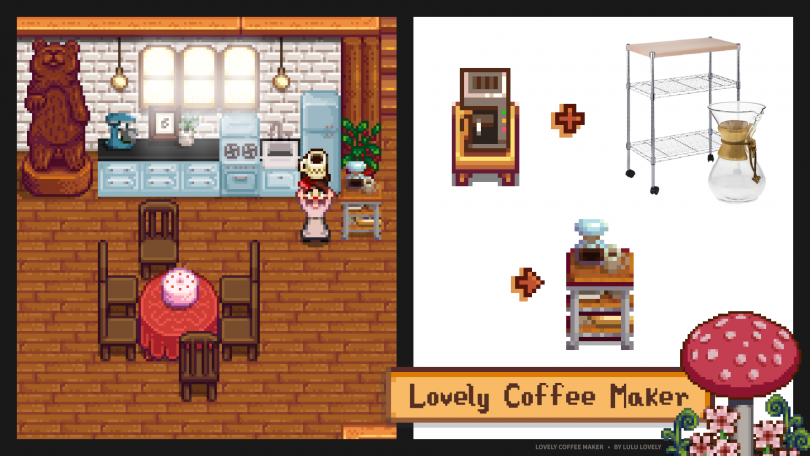
I’m on Patreon!I mean, kind of. I truly don’t expect any paying patrons, but there I am as Lulu Lovely on Patreon. It’s a dedicated place to host the various builds and mods I sometimes make for video games like Stardew Valley and The Sims. You can follow for free. Moving forward, I’ll share as Lulu Lovely when new things are ready! © 2021, published by Making it Lovely as Stardew Valley Lovely Kitchen Mod | No comments | This post may contains affiliate links; I will be compensated if you make a purchase after clicking on my links. The post Stardew Valley Lovely Kitchen Mod appeared first on Making it Lovely.
0 Comments
“This will be quick and easy,” she thought.I went into this project thinking that this wouldn’t be too difficult. New wallpaper, a fresh coat of paint, a new window shade, and a change of lighting. That’s it! It has taken some time though, as these things often do when you’re doing all of the work yourself and fitting it in around other work and life in general. The bathroom on the first floor had a lot going for it that I liked. It’s small by modern standards, but perfectly sized to me. The beadboard is charming, the wood floor keeps continuity with the rest of the house, and the leaded glass window offers privacy. The antique console sink is adorable! The separate hot and cold taps are not ideal, but we’re used to them (we had separate taps at our old house too). I also like the antique toilet and its wooden tank. The photos below are from the bathroom as it was when we first moved in. 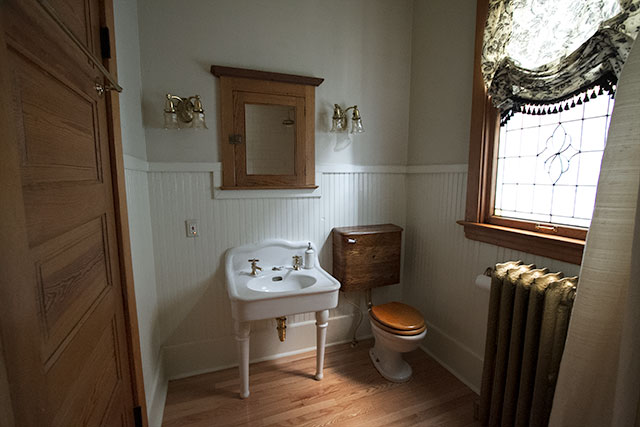
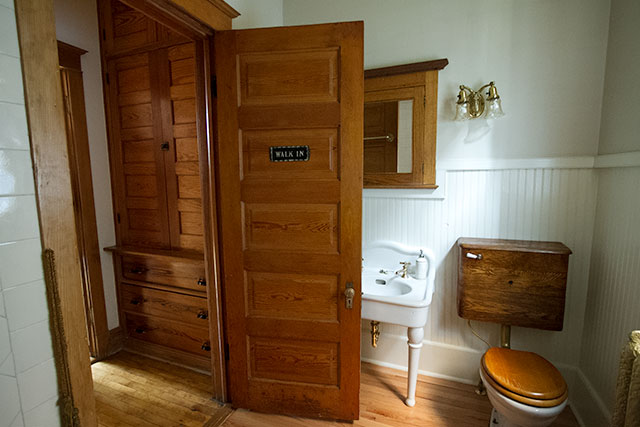
Hello, inspiration. And wallpaper.I swapped the wooden toilet seat for a black one years ago and I think that for a toilet, it’s really good looking. Other than that, we hadn’t done anything in the bathroom because while it wasn’t anything I had chosen, I thought it all looked rather nice. But it was time for a change! I found this snakes wallpaper and felt inspired. I know it’s not for everyone, but I’m excited and it’s going to be so good in the bathroom. 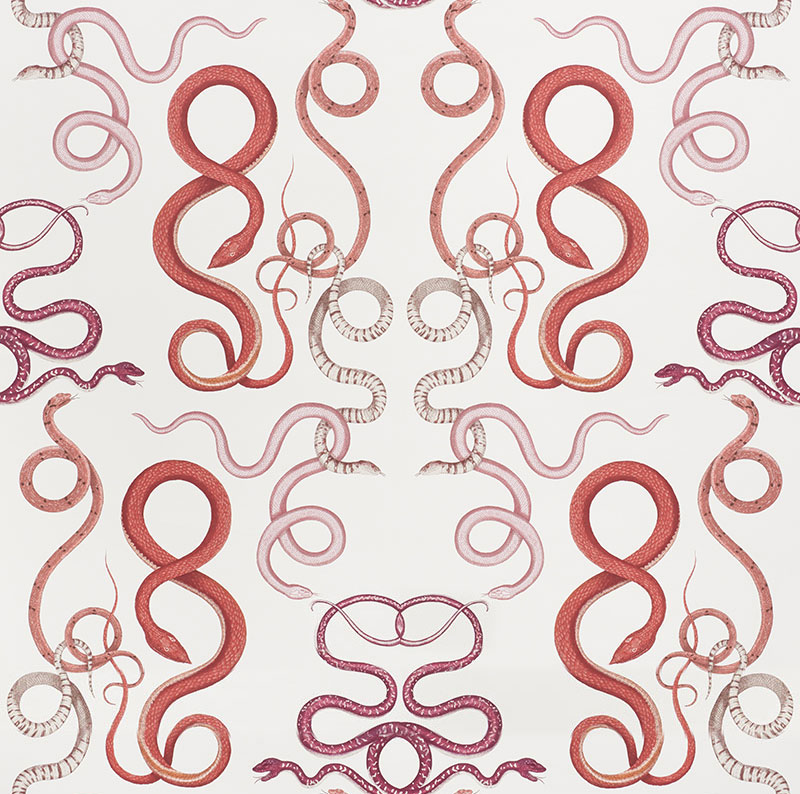
Big Cabinet of Natural Curiosities vibes. ↓ 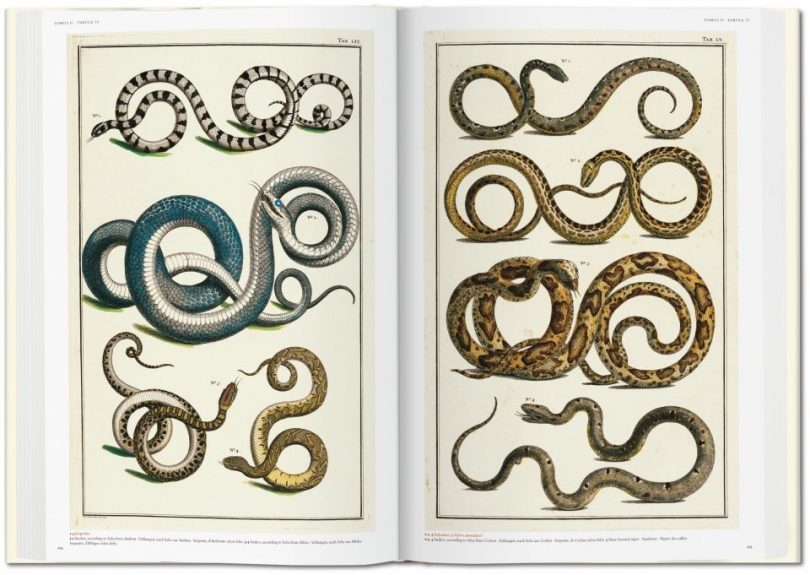
This pandemic year has been weirdly great for my creativity, and then completely zonking my energy level and sense of time passing. But hey, who came up with a plan to affordably refresh a good portion of the first floor so that it all feels fresh and works together and looks amazing? This lady. 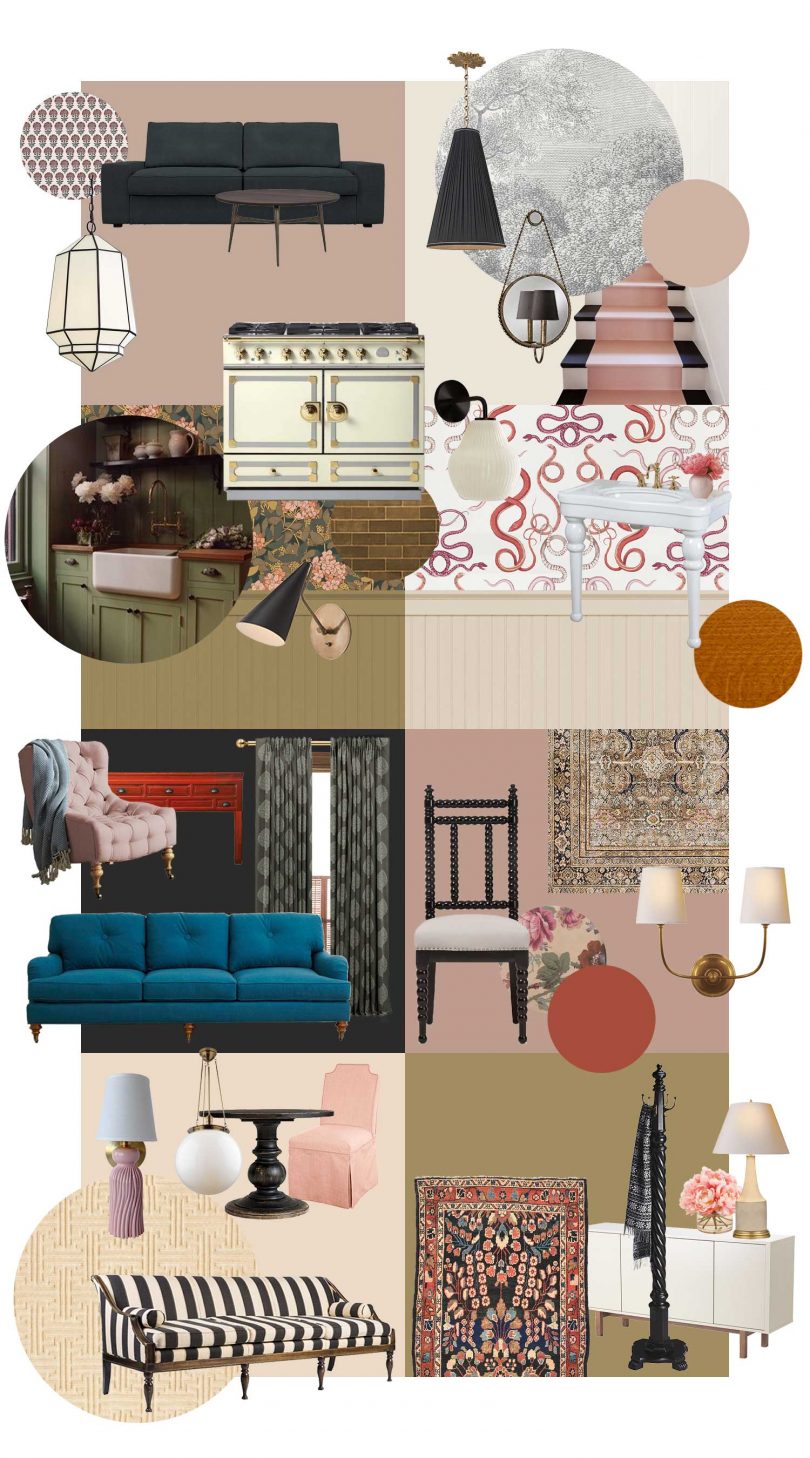
Kitchen plans on the blog to come! I’m always more up to date in sharing on Instagram these days, especially in Stories, so I’d love to have you follow along there if you’re not already. LightingOK, we’ve got the main jumping off point, the snakes wallpaper. The tiled shower is not changing, and the fixtures are staying. What can go though are those old Guillermo del Toro sconces. 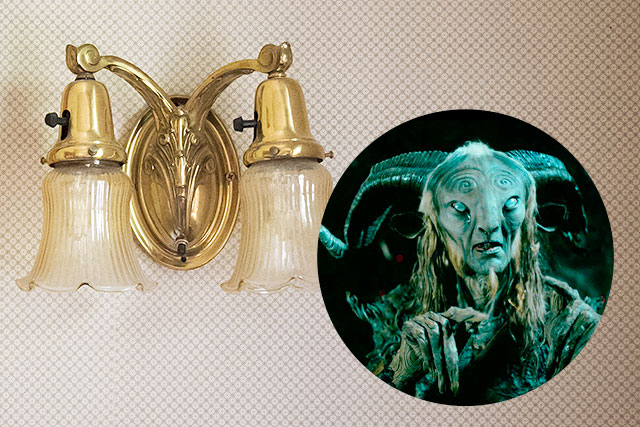
These Sculptural Glass Ribbed Pendant and matching Sculptural Glass Ribbed Sconce are from West Elm. I like the look of them on their own, but also appreciate that they reference the ribbed Victorian glass shades that were in the room before, with a definite Noguchi Akari influence. And they are damp-rated, which is something to pay attention to when selecting fixtures for a bathroom. 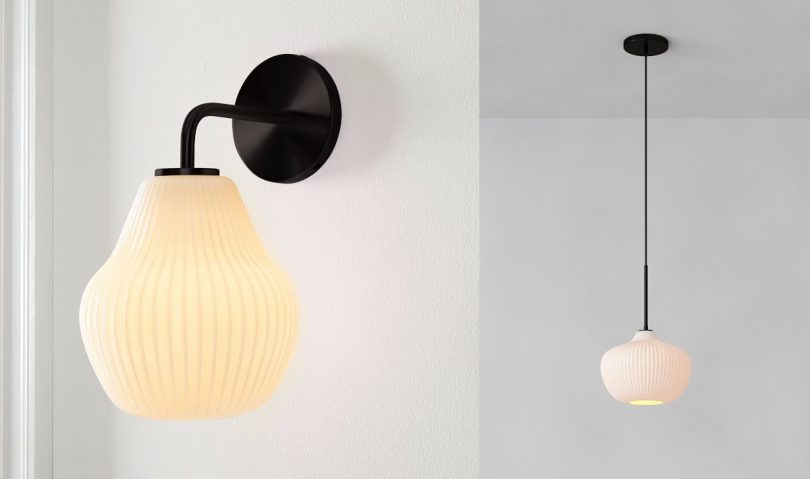
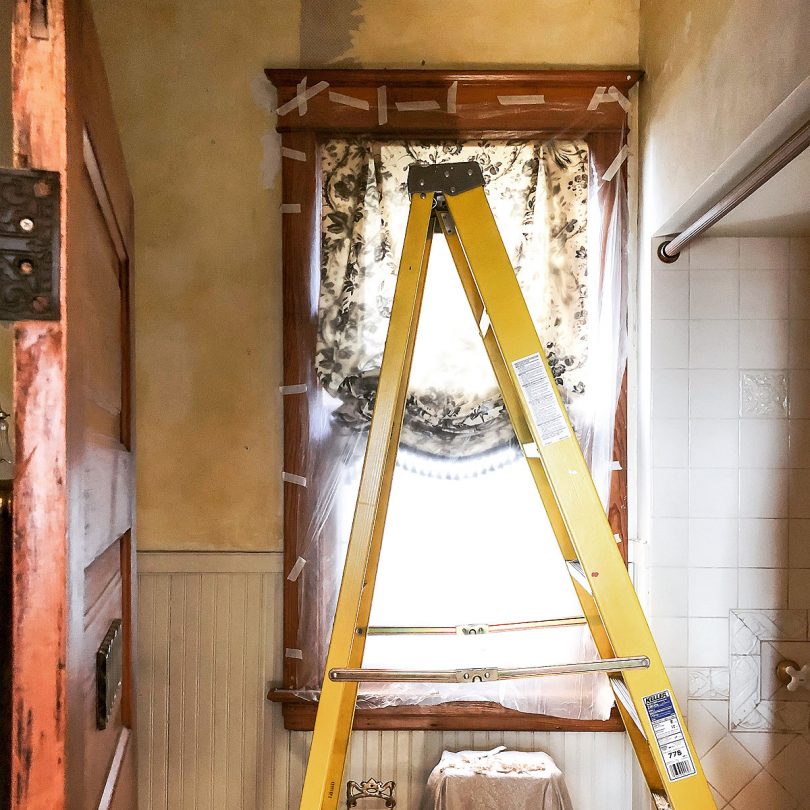
The lights have been here for a while but I held one of the sconces over a light bulb the other day and it was beautiful when lit up! There’s a junction box in the ceiling and what seems to be a corresponding light switch. I’ve already taken the cover plate off and the wires inside look to be newer than some of the horrors I’ve uncovered in this house. Will it work when I hook up a light? Let’s hope! Otherwise, that’s a job for an electrician. I am doing all of this work myself and I can swap out light fixtures, but I don’t feel confident in DIY troubleshooting of electrical issues. FabricI liked the roman shade that was here with its etching-style illustrations of birds and tassel fringe, but it doesn’t go with the new design. My first thought for a new fabric was to go with stripes, but between the fabric, ribbed glass shades, and beadboard, it would have been too much. If I were going to choose a solid color, I’d match the ivory linen of our shower curtain. Nice and easy. But we never ever do nothing nice and easy. 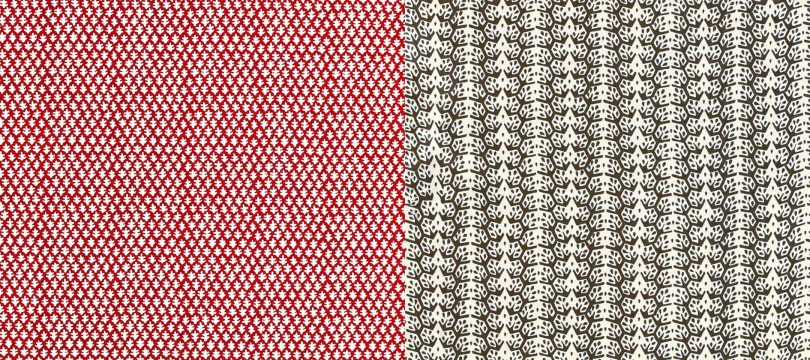
It’s between these two Sister Parish fabrics (Burma in red and Cecil Stripe in dark brown). There was a flash sale and I got such a good price that I ordered both. PaintSo easy. Our dining room is pink with a red ceiling. The kitchen and it’s little hallway/storage area will be, essentially, Caca Dauphin. (Did you know that story!?) The bathroom is between these two saturated, colorful spaces. I am not painting the quarter sawn oak on the first floor, but everything else was fir or pine, and I am completely fine with painting that. The doors on the second and third floor are all black, and now the bathroom door is as well. The door trim, window trim, and medicine cabinet have all been sanded and primed, and I’ve given them and the beadboard all a matching coat of satin paint in Benjamin Moore’s Bare Essence. It’s a warm neutral, and a match for Farrow & Ball’s Joa’s White. It’s also a near match for the existing shower tile and looks great with the new wallpaper. 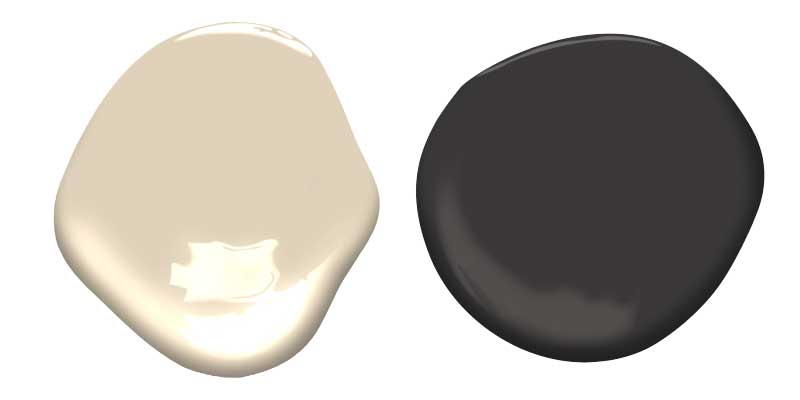
The Bathroom DesignAll together now! 
The painting is just about done — I need to do one more coat on the window and medicine cabinet. Then it’s a coat of wallpaper primer on the walls (Shieldz) before I can hang wallpaper and finally install the sconces. Roman shades are not the easiest to make, but I’ve gotten a little experience with them now and feel good about my window treatment skills. Slithering along. © 2021, published by Making it Lovely as Bathroom Design Plans | No comments | This post may contains affiliate links; I will be compensated if you make a purchase after clicking on my links. The post Bathroom Design Plans appeared first on Making it Lovely. I wanted to do a little refresh of the bathroom on the first floor. The shower is fine. The antique console sink with separate hot and cold taps, paired with an antique toilet complete with wooden tank? Sure, stay as you are! The plan was to put up some new wallpaper, change out the lights, and do a fresh coat of paint on everything. Coming up with the plan was easy! Executing it has not been fun. 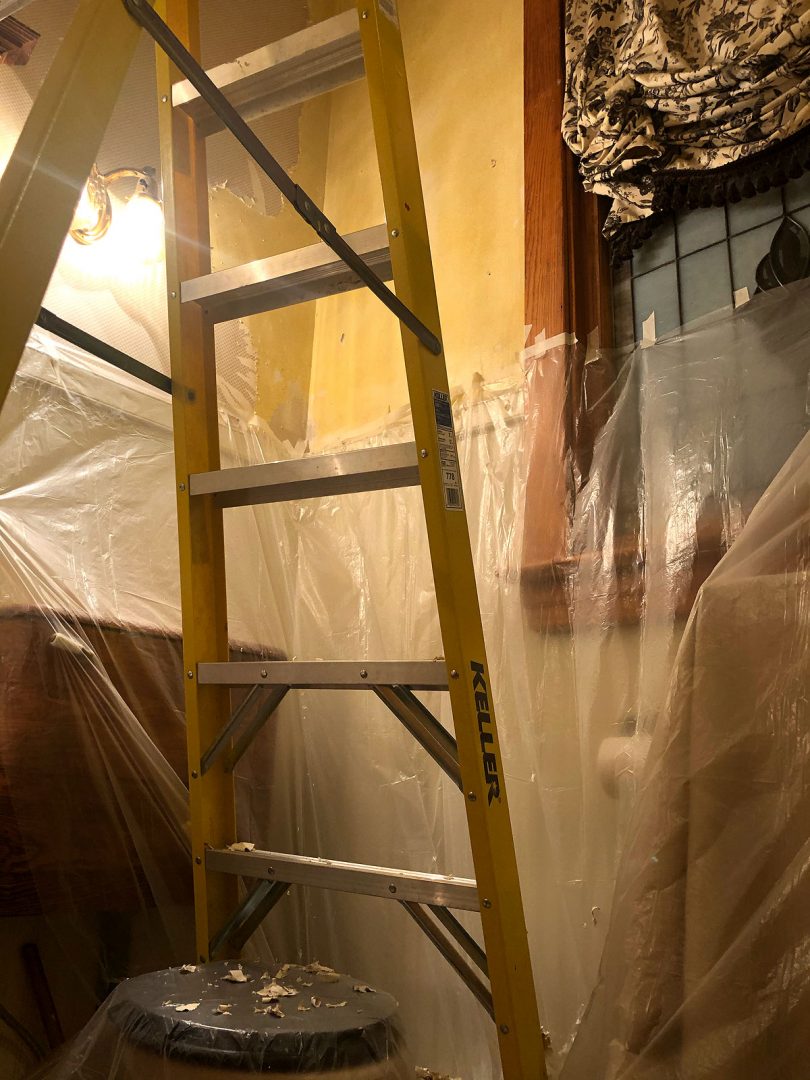
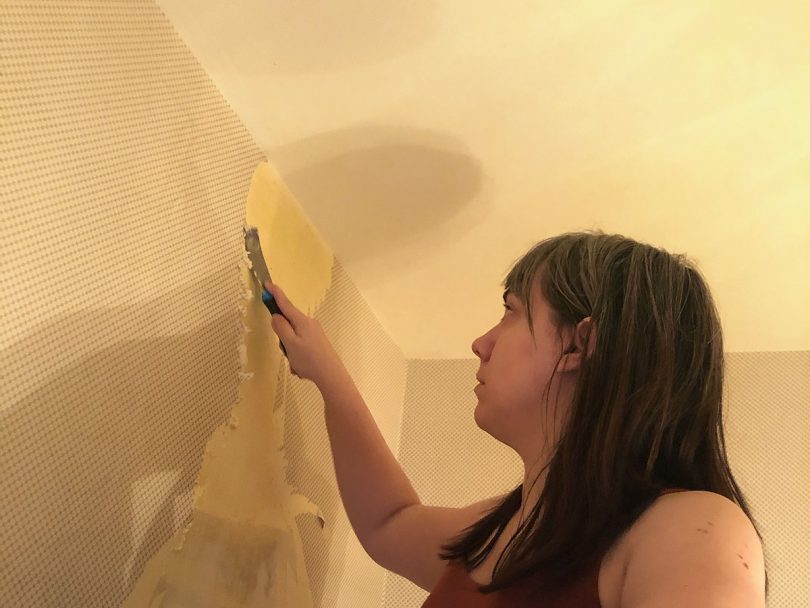
Why Not Just Paper Over the Old Wallpaper?The bathroom gets pretty steamy during showers, so I had concerns about the longevity of wallpapering over the existing paper’s slick surface. I’ve removed wallpaper before — in this very house even — and while I knew it would take some time, I truly did not think it would be all that bad. I spent at least 40 hours stripping the old wallpaper! Ridiculous. The wallpaper had been applied directly to unpainted drywall and bare patched spots, so it came off in teeny tiny pieces (sometimes taking the drywall’s paper backing with it and softening the mudded areas). As I shared the process in real time in Instagram Stories, people reached out to ask why I didn’t just drywall over it all once I realized how bad the job would be. I suspect the wall with the medicine cabinet actually is a layer of drywall over the original plaster. But why not do it over the existing paper? Putting up new drywall, taping, and mudding would take nearly as much time and effort while losing some of the depth of the room and trim profile. There may be a slight benefit of time saved, but at the expense of architectural details. So I continued on with the tedious job of stripping the wallpaper as neatly as I could. 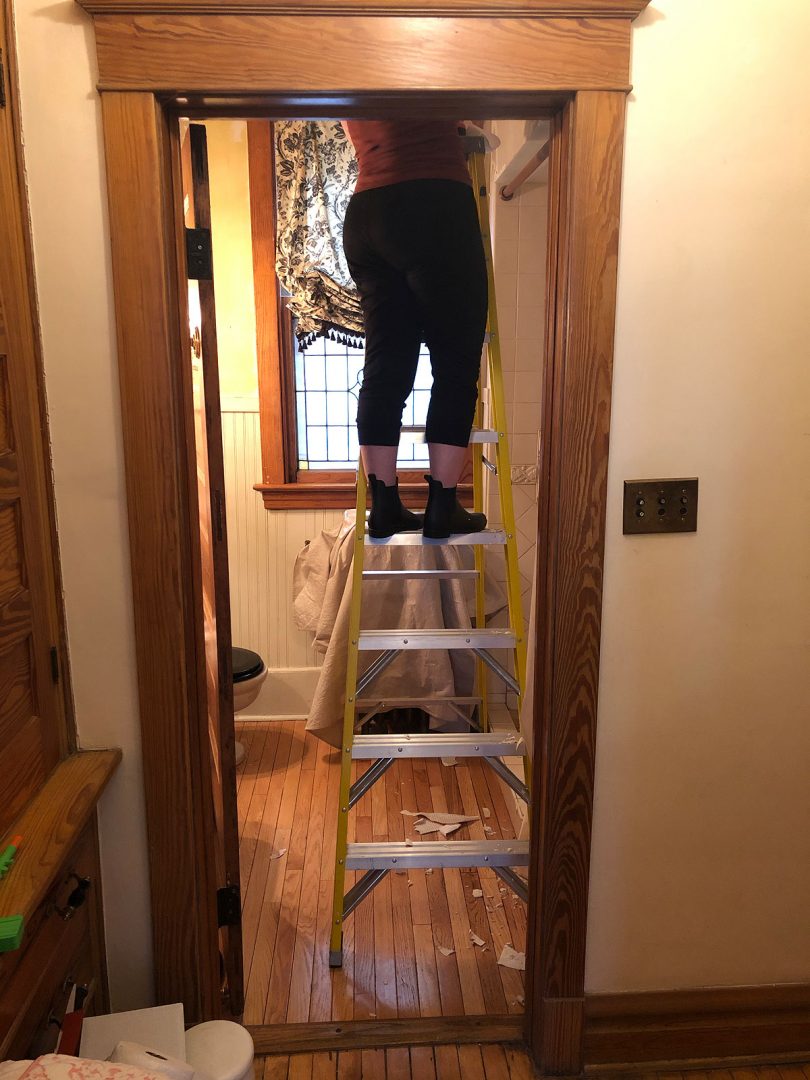
Wallpaper Removal MethodsI tried scoring. Steaming. Soaking. Applying DIF wallpaper remover (with no noticeable difference between the liquid concentrate and the gel version, and no improvement over very hot water from a good spray bottle). There was no magic solution to make it go faster, though the wallpaper scoring tool did make the biggest difference. I tried a wallpaper removing tool, but preferred a small putty knife. I did the work in batches. Three hours here, four hours there. There were a few long days too, but I learned my lesson early on when I kept pressing and did 12 hours of scraping and then couldn’t sleep because my shoulder hurt too much. I’m not as good at scraping with my non-dominant hand, so most of the work was all repetitive motion with the same arm. I did finally get a scaffold after trying to reach various parts of the wall 10′ up with A-frame and multi-position ladders. I’m nervous about heights, so being four feet up is a stupid big deal to me. Any clanking noise or slight feeling of movement startled me! A truly unenjoyable experience all around. 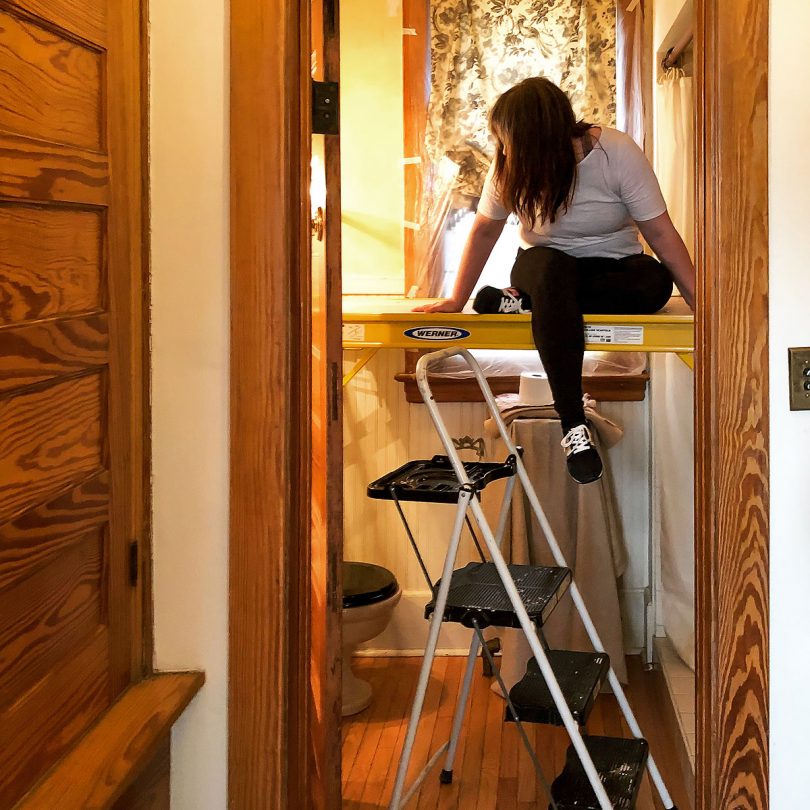
Repairing the Walls and Preparing to Wallpaper AgainThe job is done! Well, the wallpaper removal part is. Now I need to repair the damage left behind and get the walls in shape for new wallpaper to come. I’ll start by scrubbing the walls with DIF (vinegar is good too, but I already have the DIF on hand) to clean off any glue residue left behind. I’ll let it dry and then put a coat of Gardz on the walls before making my repairs (there will be many). So much Durabond to apply! I don’t think I’ll need to do a full skim coat though, just fill in areas here and there. Then it will be time to sand smooth and spot-prime with Gardz again. Following that up with Shieldz to prime for the new wallpaper. 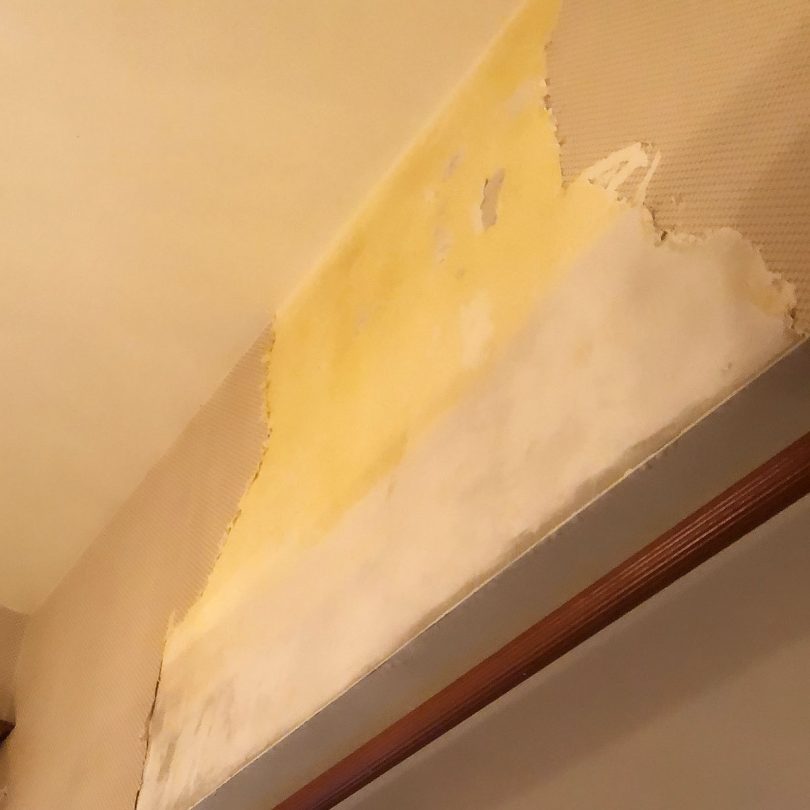
Priming for WallpaperWhy does one need to use wallpaper primer? One, it is opaque and will even out the wall color so no splotchiness shows through my new paper. Two, it gives you a little more wiggle room to slide the wallpaper into place before it dries. And three, it makes for easier future removal. I’m putting intertwined snakes up — I imagine future homeowners may want to make a change at some point.
Prep Work and Painting the Rest of the BathroomAll of that work so far and to come was just for the top half of the walls! The lower half of our bathroom has headboard wainscoting. I like it and want to keep it, so I’ll give it a light sanding, clean it, and paint it. One coat? Who am I kidding, I know it will be two. The window, medicine cabinet, and doorway will all be sanded, cleaned, primed, and painted the same color and finish as the beadboard. Two or three coats on everything. The door will be done too, but in black, and the ceiling to match the woodwork in a flat finish. The ceiling needs some repair attention too — it was patched when we had to rip it open to repair leaking pipes in the bathroom above. I like a flat look on the ceiling, so I’ll be using Benjamin Moore Aura Bath and Spa paint in a matte finish. A lot of work and I’m only halfway done, if that. But continuing on! It will be worth it in the end. © 2021, published by Making it Lovely as Stripping Wallpaper in the Bathroom | No comments | This post may contains affiliate links; I will be compensated if you make a purchase after clicking on my links. The post Stripping Wallpaper in the Bathroom appeared first on Making it Lovely. Oh hey, remember when I was going to make over my dining room because I was inspired by a moth? I did it! 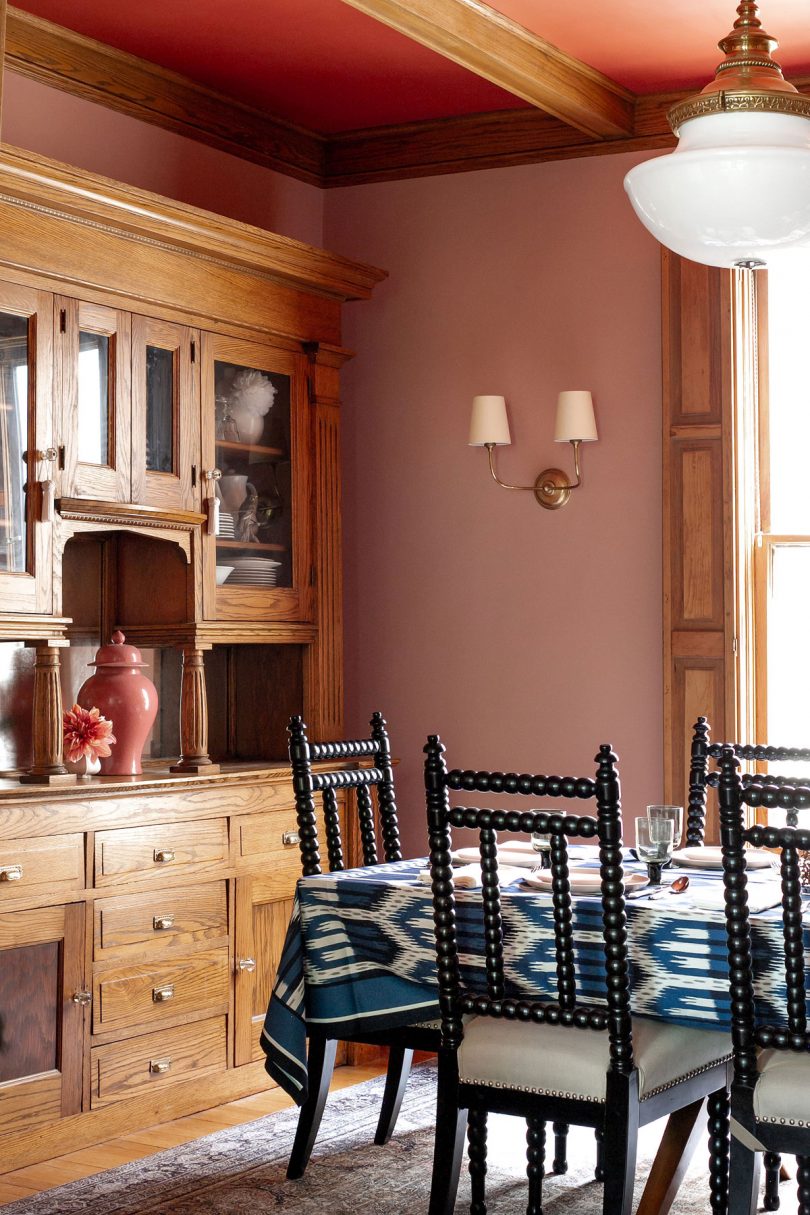
I need some art in there still, but I’m waiting to find just the right thing, rather than rush out to fill blank wall space. And I’m not letting that stop me from taking photos of what is a 92% completed room. I saw a post about the life-sized papier-mâché octopus from the 1893 World’s Fair here in Chicago, and I thought to myself ‘I should make things out of paper mâché.’ It hasn’t happened yet, but in my head I know it would be great. Moths for the dining room! Maybe not. But then I do want to make mushrooms that look like they’re growing out of the walls to line the hallway on the third floor, making you feel like you’re a little itty bitty thing in a fairy forest. Normal decorating stuff. The room looks pretty much exactly like the mock-up. I’ve gotten good at doing renderings in Photoshop and SketchUp, honing my skills first for fun and for the blog, now just as often for clients to show what their spaces will look like. It’s a weird thing because I can see it in my head coming together just fine, but then I like to make it happen digitally to show others, and then I have to actually DO the work to make it happen. Like, I’ve already done the work of designing it, now I have to do all this other stuff? Blah, fine. I’ll paint for four days. 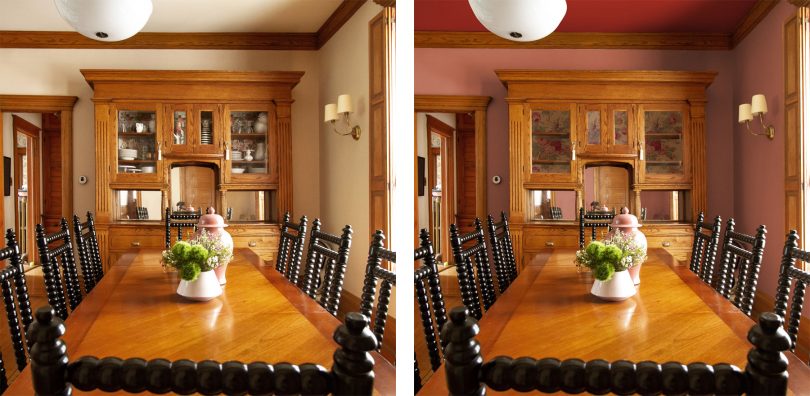
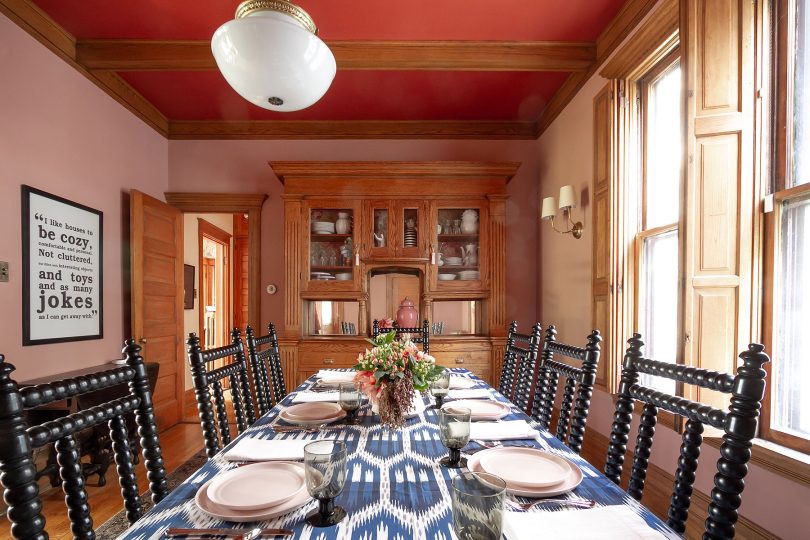
There’s some unwanted bokeh I don’t know how to avoid (is it dust, or the aperture being open too wide?), and yes that light is centered length-wise on the room but not width-wise. The junction box is in a faux wood beam and it seems like more hassle than it’s worth to move it. It’s probably because I don’t sit at that end, but it bothers me far more in photos than in real life. There are always more pressing/exciting things to do around here than to move that light. Another before, rendering, and after. Pretty spot-on! 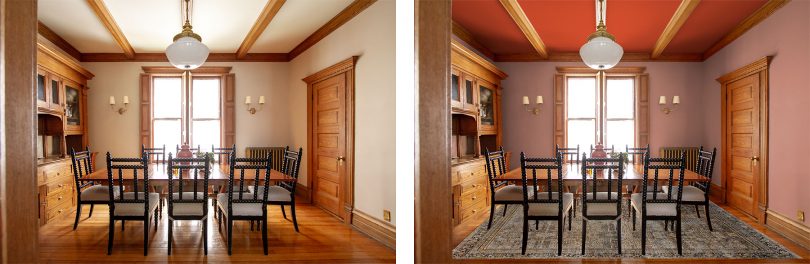
We have always been able to do the amount of work we do because I do so much of the manual labor, but that doesn’t mean I always want to. We hired out painting a handful of times and it was a dream. Snap your fingers (and spend some money) and it’s done! Voila. I wish it happened more often, but money saved on painters is money spent on an electrician to add sconces where before there were none. 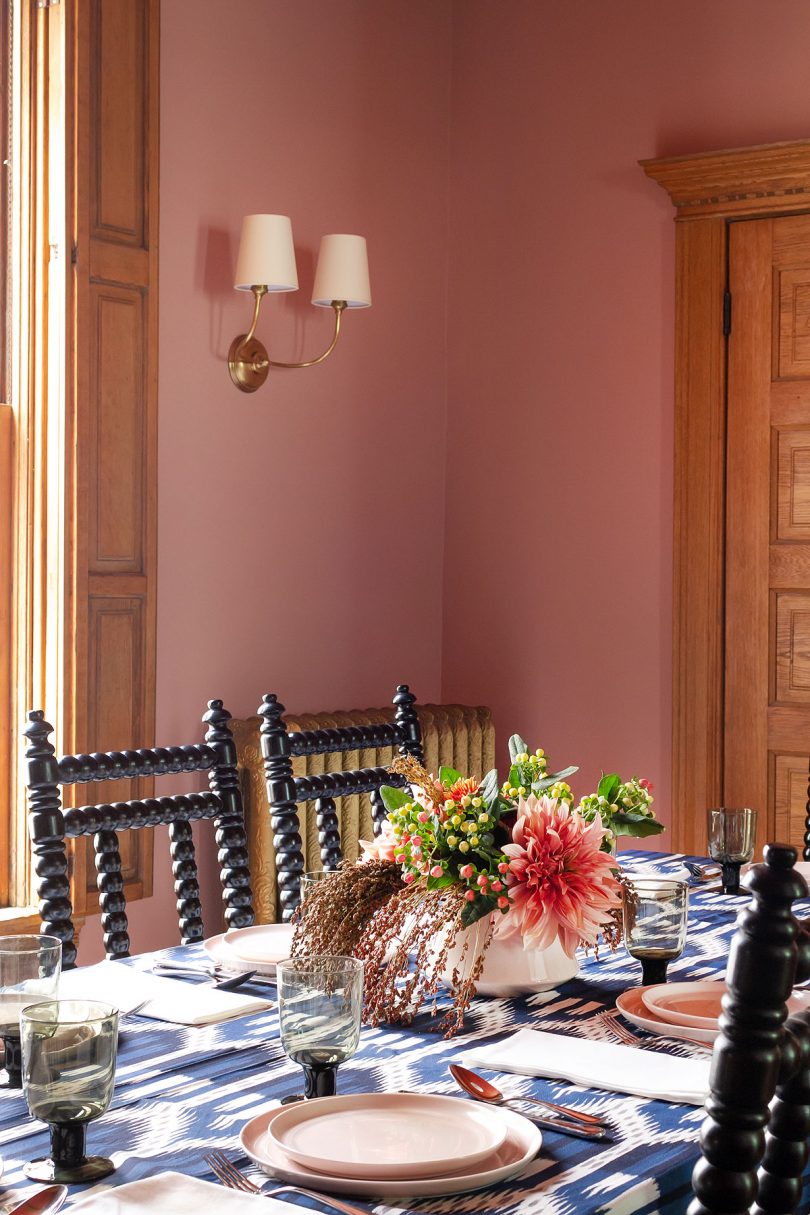
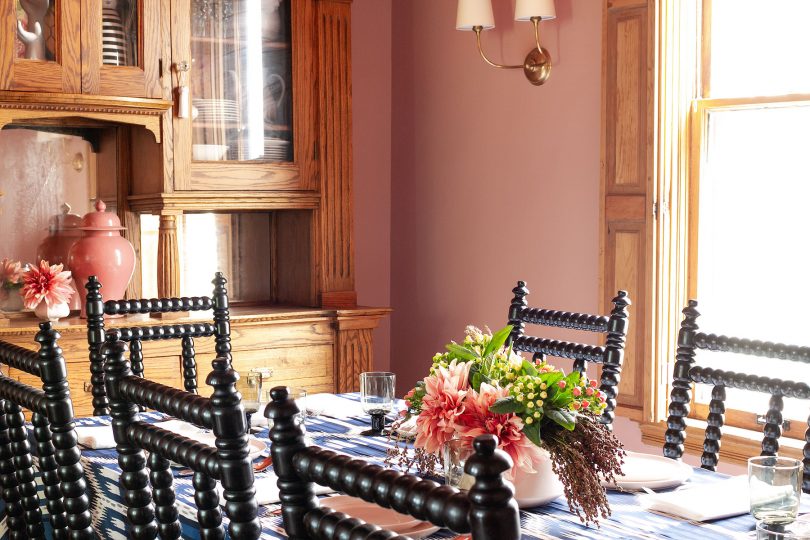
The sconces are Vendome, by Visual Comfort. A modern classic. Note the delicate arc of the arms, subtle details, and pretty finishes. If those details are less important to you, you can get a very similar look for a lot less with this sconce. 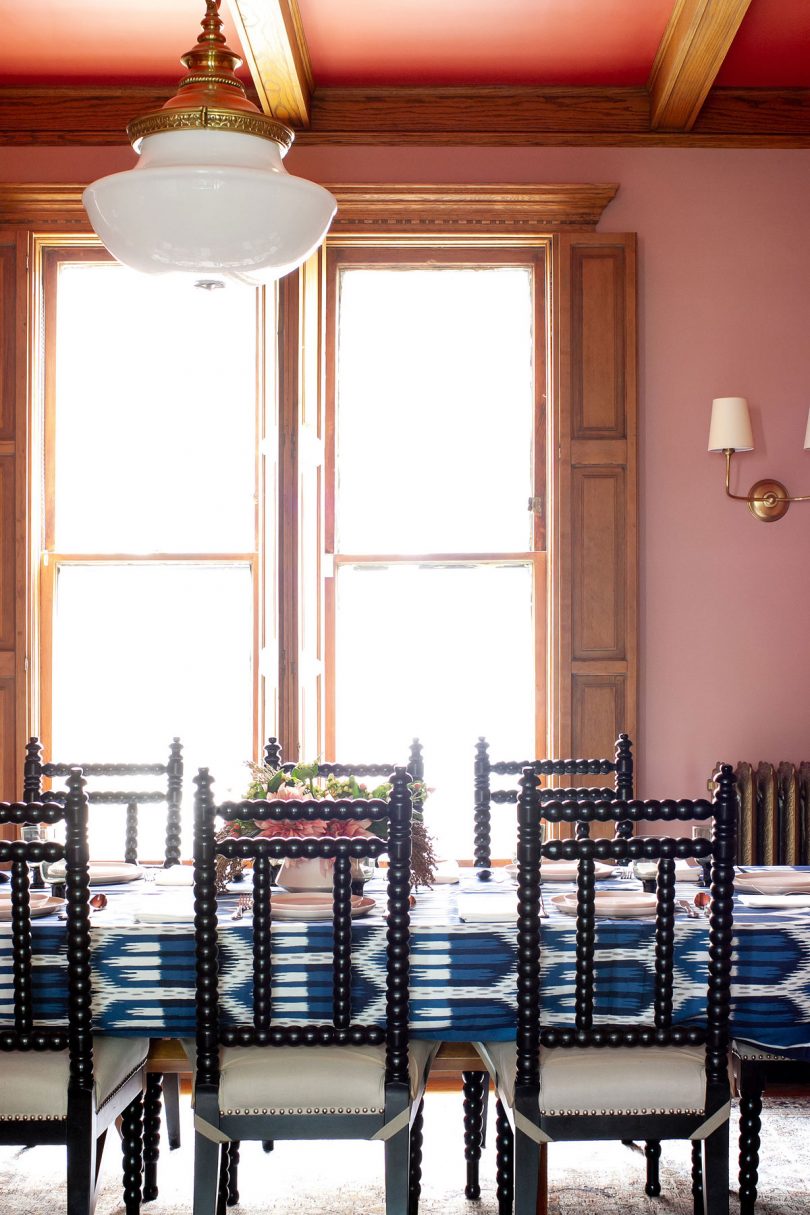
The tablecloth was from the Schumacher collection for Williams-Sonoma (sold out, but some of the other items are still available). You can buy the same Bukhara Ikat pattern in their cotton sateen fabric, but I wouldn’t recommend it for a tablecloth. 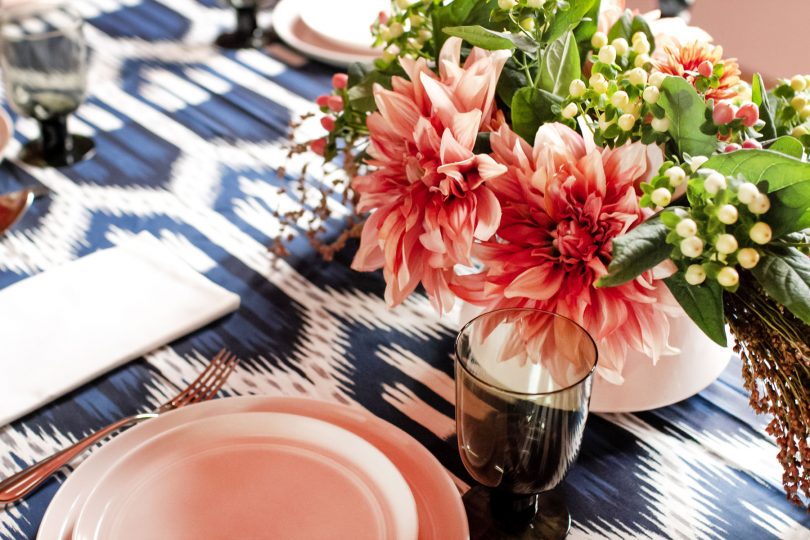
I found and put in the room very briefly a rug I bought off of Facebook Marketplace. It was pretty, but too plush for a dining room, so I rolled it up and sold it for the same price I bought it for. Hello Calvin, my little model, and thank you for so cutely rocking the haircut I gave you! (I’m getting better at them as I go — I think we’re on round three of at-home haircuts by now.) 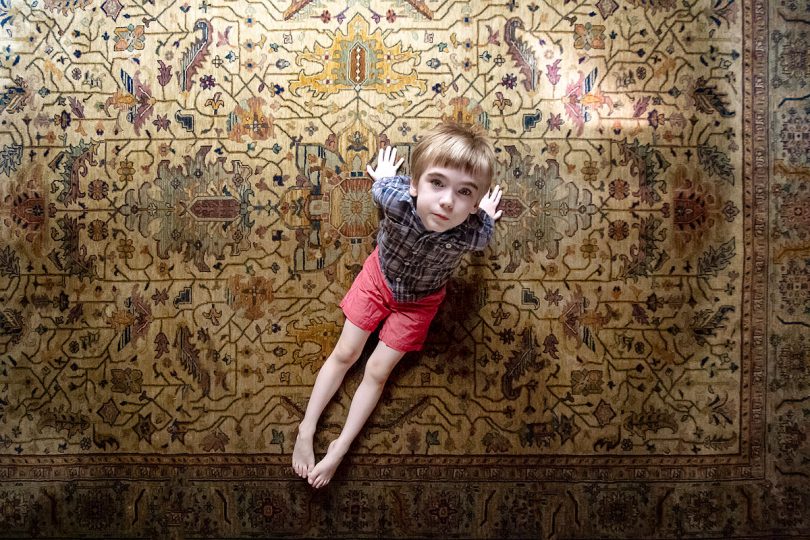
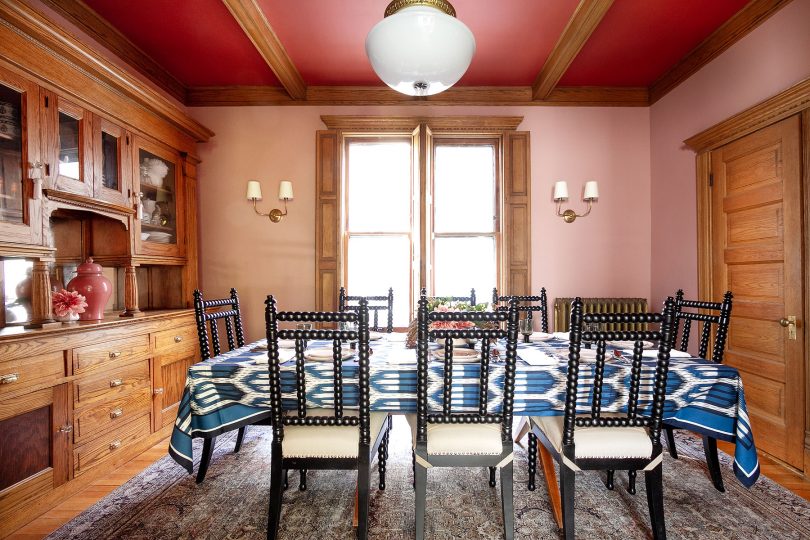
The rug we ended up with was me giving up on sourcing vintage rugs solely online during a pandemic and just wanting to be done with that task. Done! It looks great in photos and in person, but be aware that it is printed. I’ll usually opt to invest in something a little nicer, new or old, but in this case an inexpensive rug that’s super easy to vacuum (the flat texture means no food can get trapped in the weave) was exactly what we needed. This is the Loloi Layla rug in olive and charcoal. 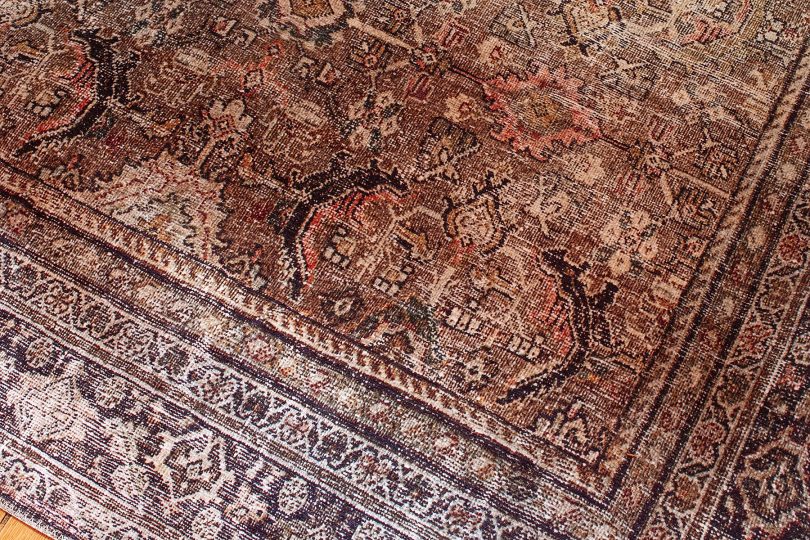
I talked a lot about the process of this room coming together on Instagram Stories. Did you see the wallpaper I was considering for a client that I ended up falling in love with? And not getting? 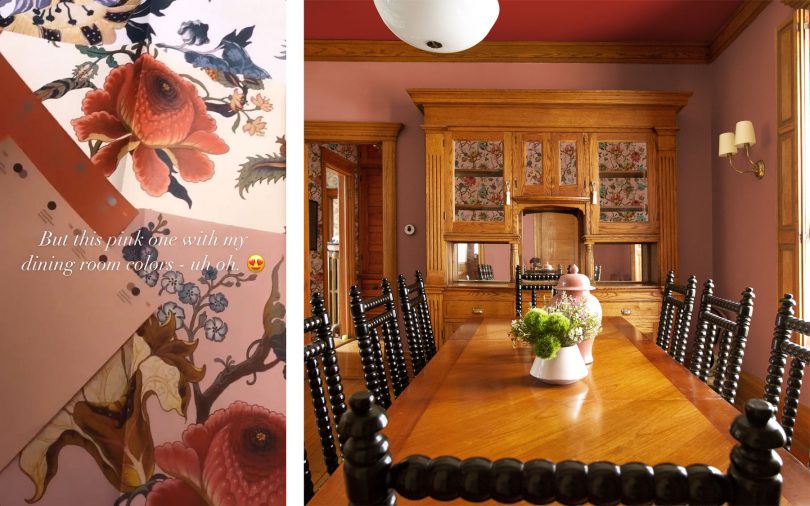
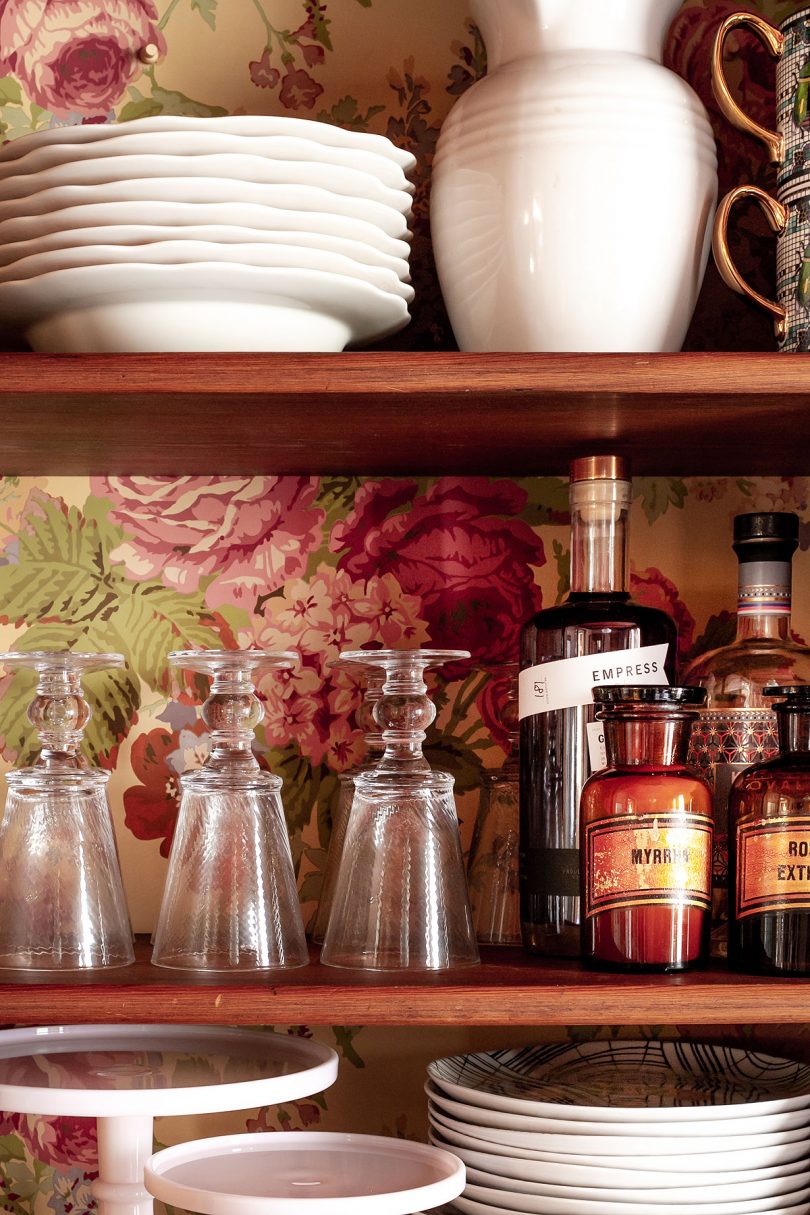
I would have loved to paper the little hall between the dining room, kitchen, and bathroom, and also use it to line the back of the hutch. It would look amazing! But I had rolls of Ralph Lauren paper in the basement left from the previous owners (the pattern in the snug) that matched pretty well. I don’t love the pattern nearly as much, but I like it a lot and it was free. 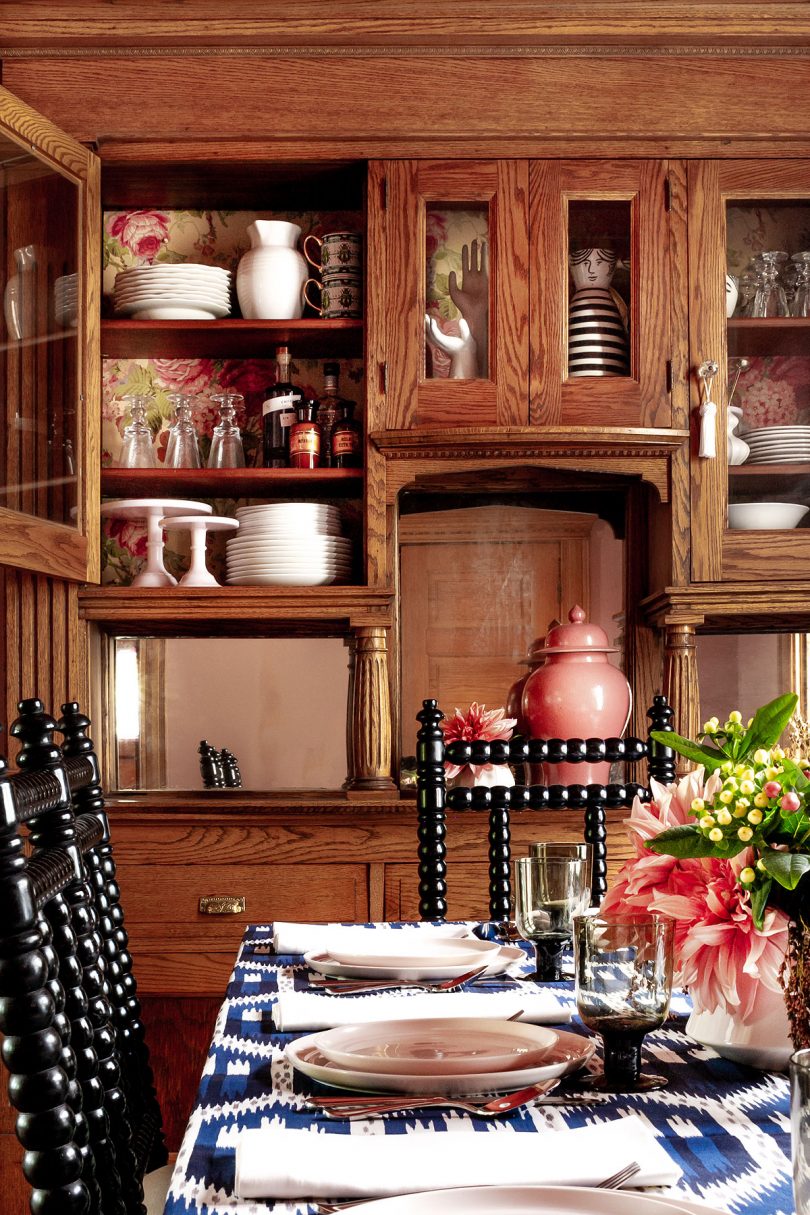
Saving that expense (about $1000) let me put that money toward snake wallpaper for the bathroom which is equally exciting! Oh boy, there’s so much going on here that I need to put into blog form. Good stuff. 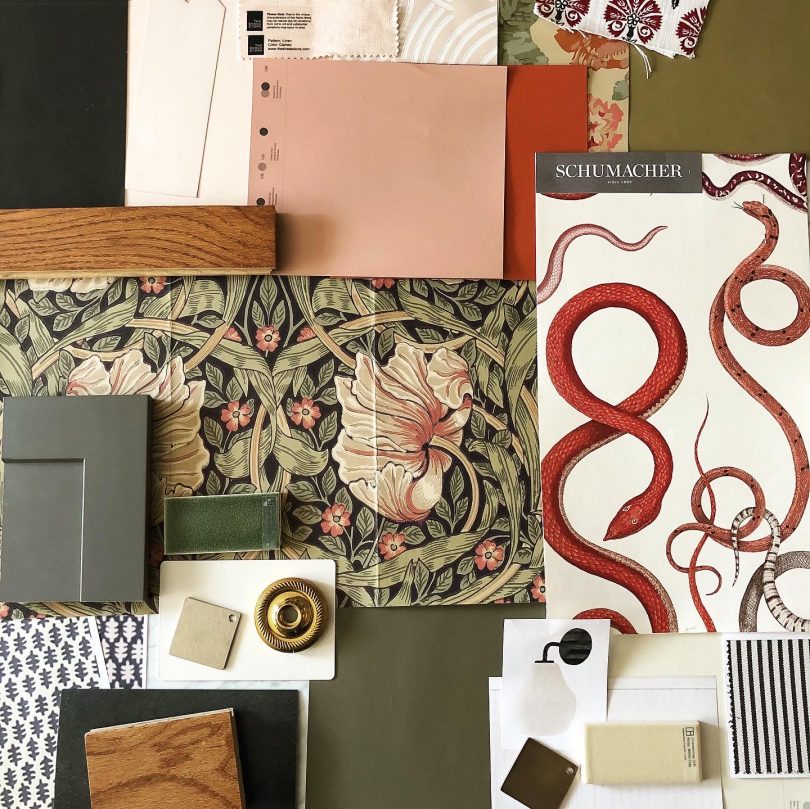
I’m feeling creative and motivated to work on the house again after doing this dining room update. It’s a good feeling! And woe is me for complaining about painting a ceiling, because I’m stripping wallpaper that was applied to bare drywall now and that has proven to be the far more laborious task. Oh, house. You don’t make it easy sometimes! It’s a good thing I love you as much as I do. We’ll get that bathroom looking amazing soon enough. And maybe a kitchen update to follow, hmm? 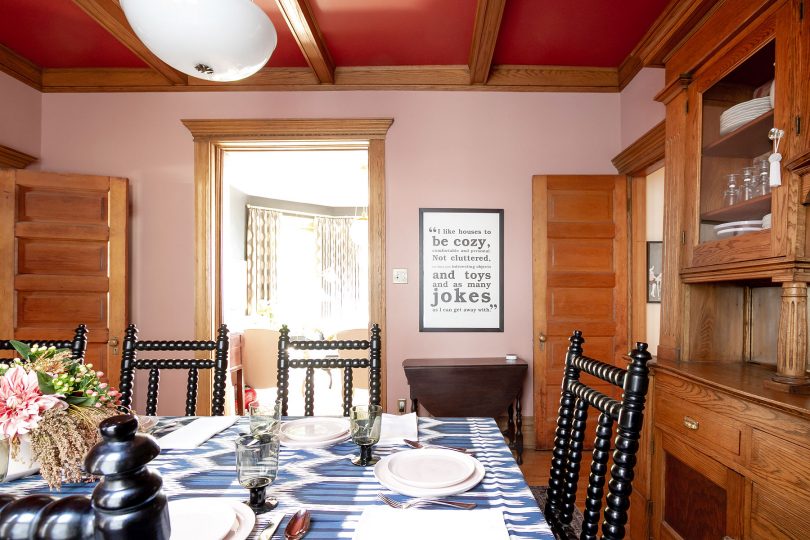
© 2020, published by Making it Lovely as My Pink Dining Room with the Red Ceiling | No comments | This post may contains affiliate links; I will be compensated if you make a purchase after clicking on my links. The post My Pink Dining Room with the Red Ceiling appeared first on Making it Lovely. 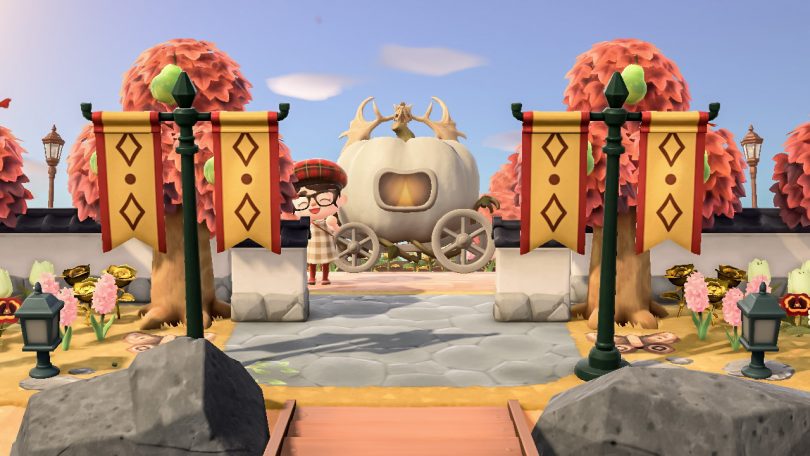
My favorite games are all of the “let’s be friends and make our houses and towns cute” variety. 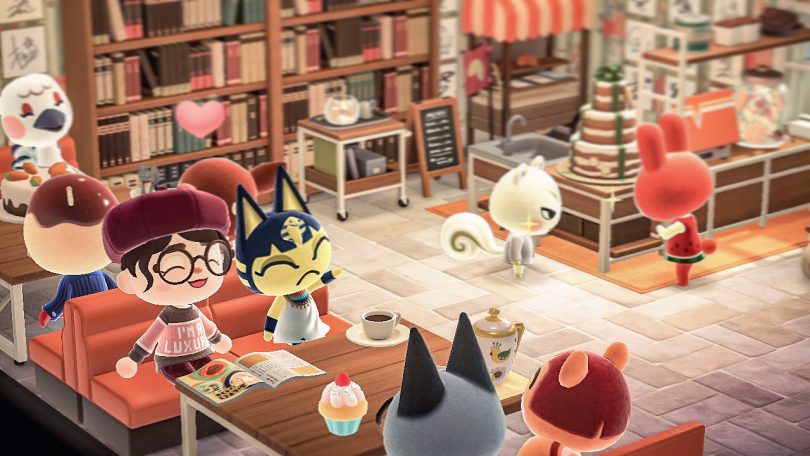
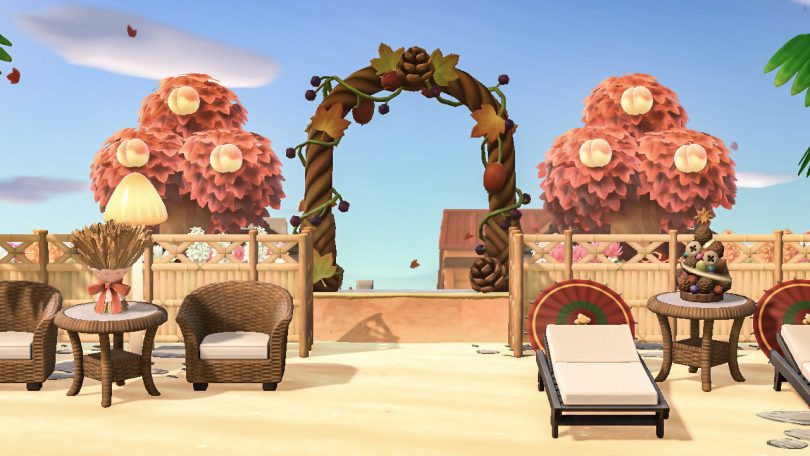
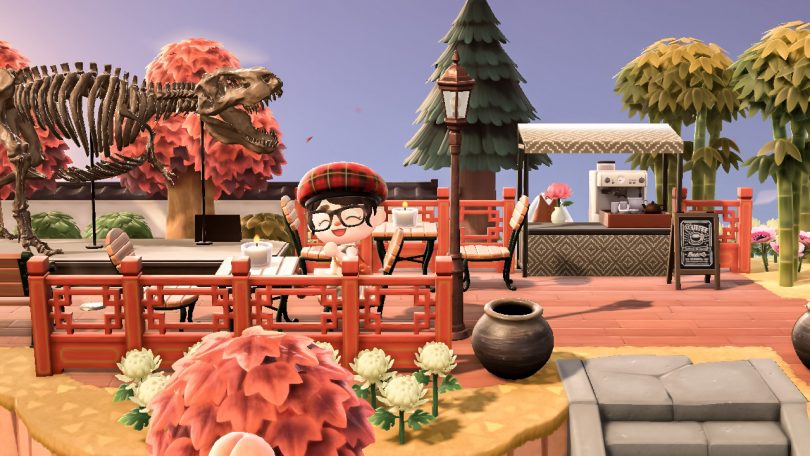
Animal Crossing came along right when we all needed it this year, and I’m pretty pleased with my virtual island. Let me show you around! Dream AddressI updated the Dream Address the same day I took photos all around the island. Come on over to visit! DA-1449-9039-6742 
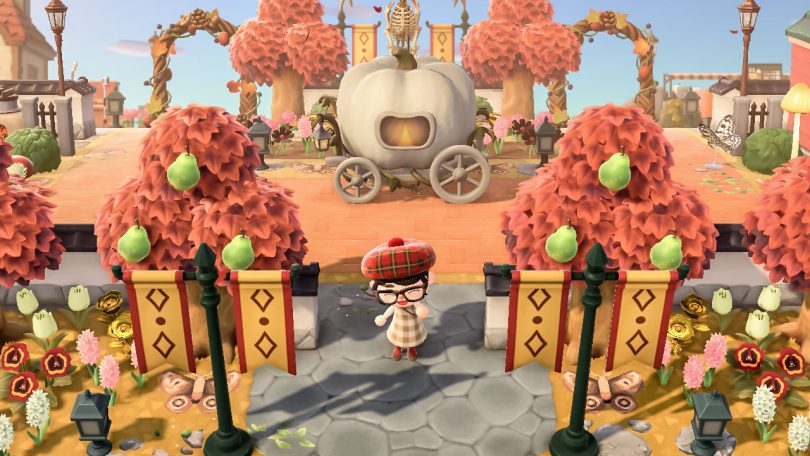
I have an Instagram account dedicated to Animal Crossing too: Animal Crossing_LuluLovely. I’ll add a bunch of these photos in huge batches that will overwhelm feeds and hit right as people are looking for winter inspiration. (It’s a case study in what not to do to grow an Instagram account!) The EntranceAll right, let’s look about. I realized that I forgot to take any photos of the area around my house or inside, but there are still a TON of shots, so it’s probably for the best. Welcome to my Lovely island! 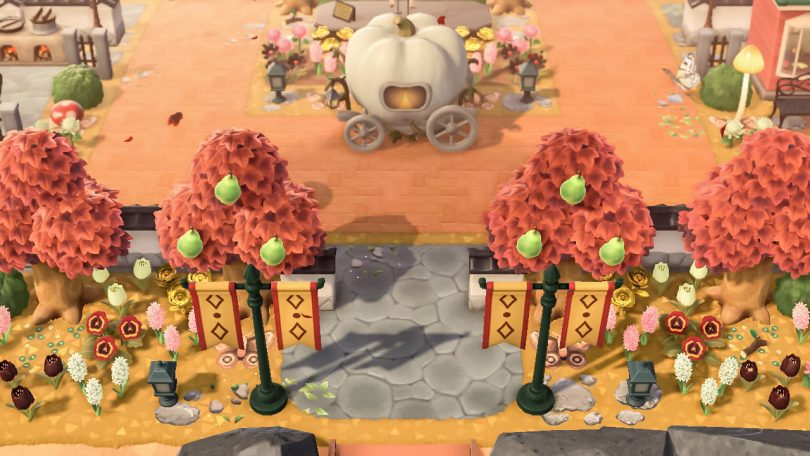

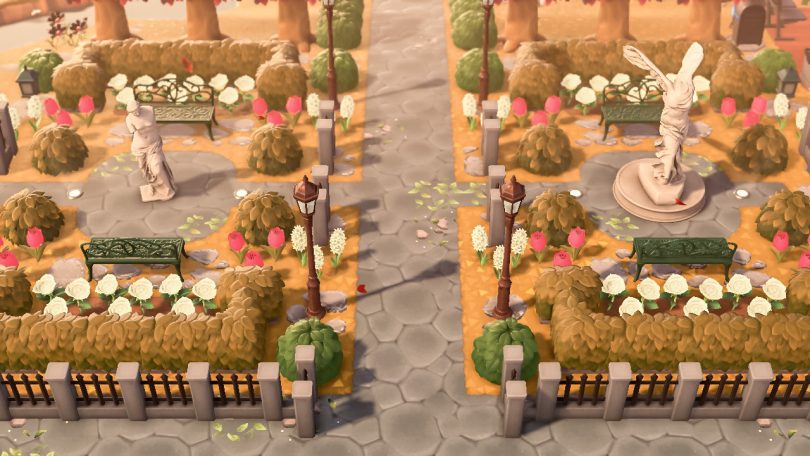
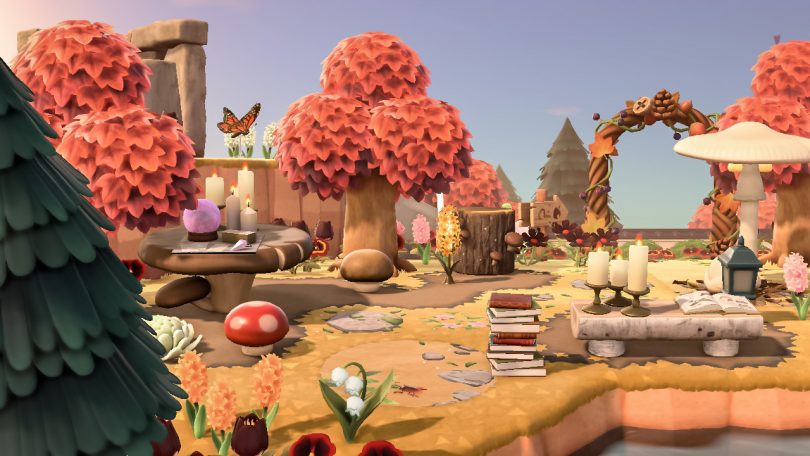
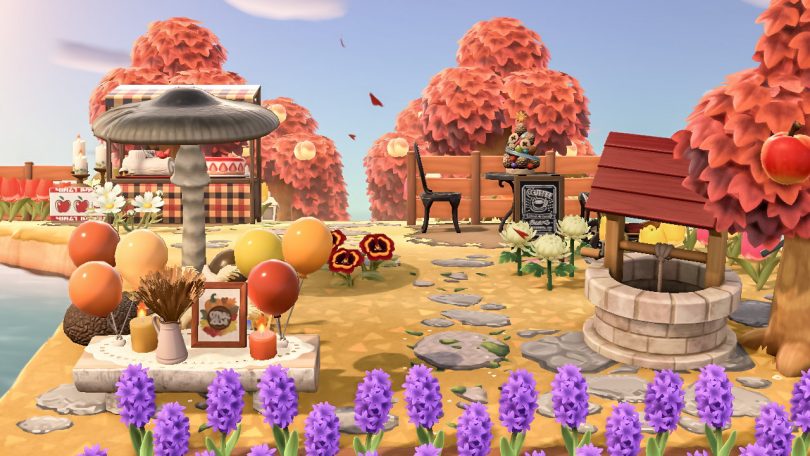
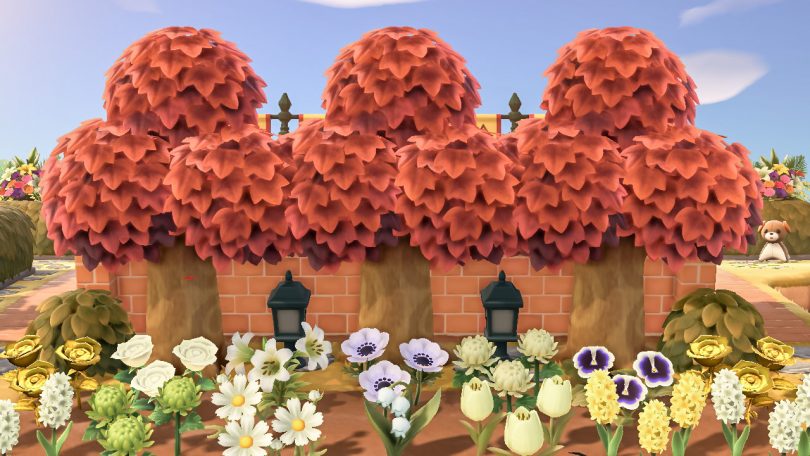
The Formal Garden

The Post Office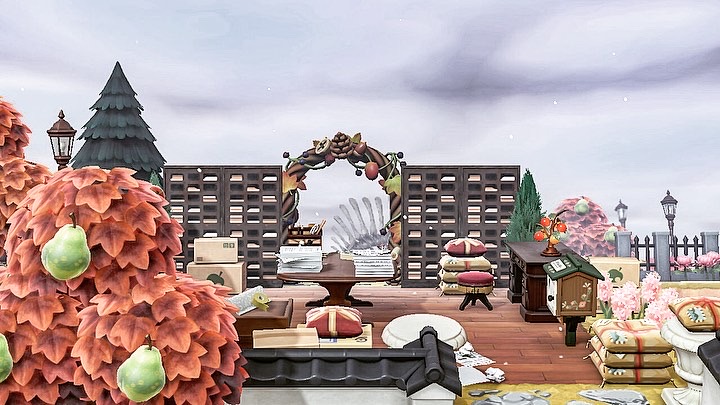
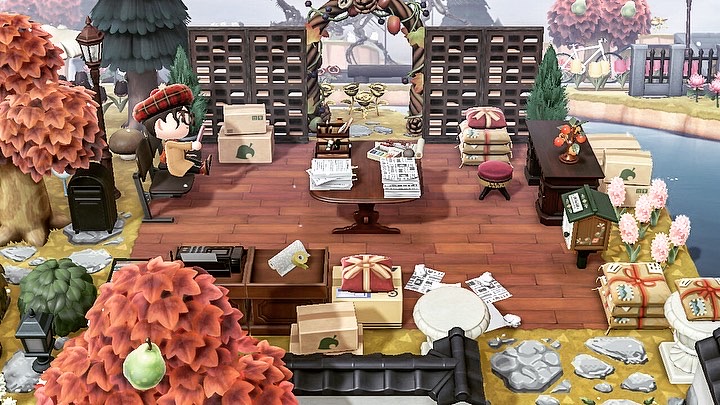
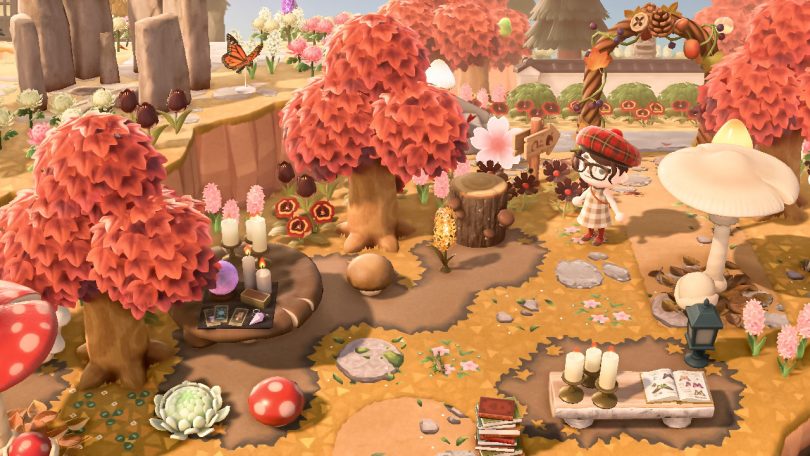
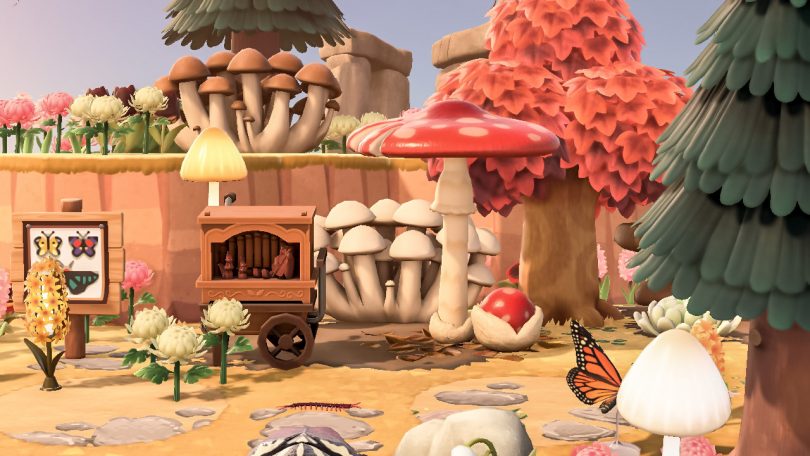
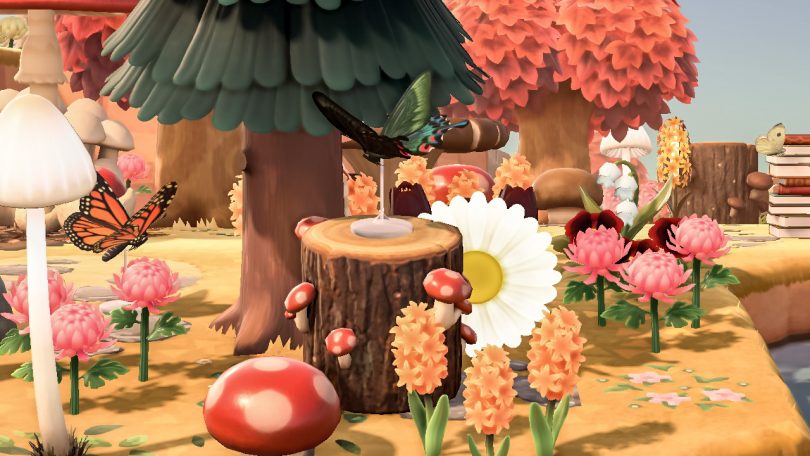
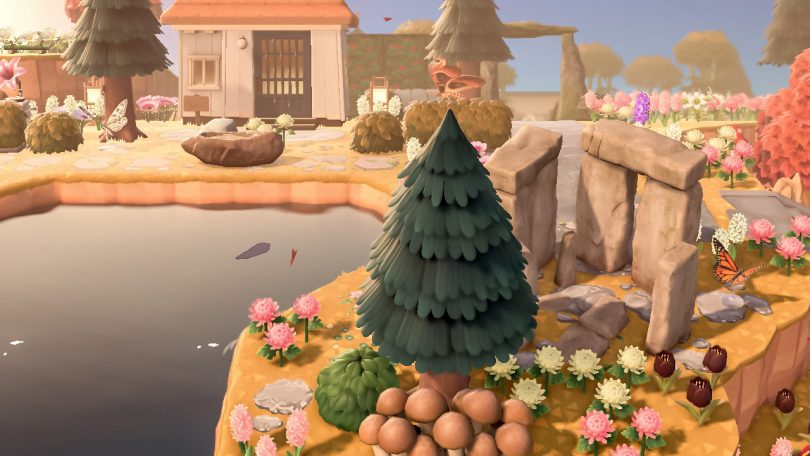
Mushroom Fairy Forest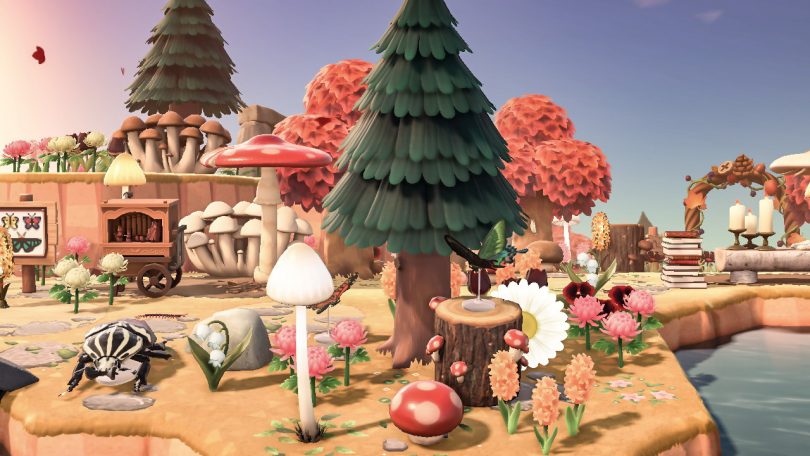
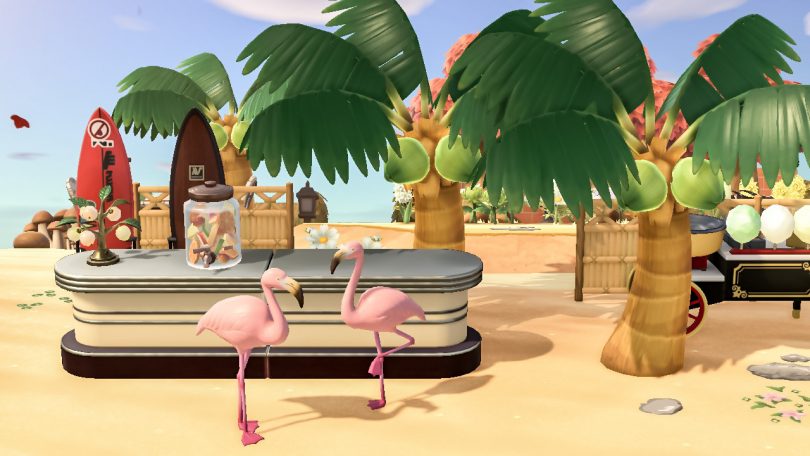
The Beaches
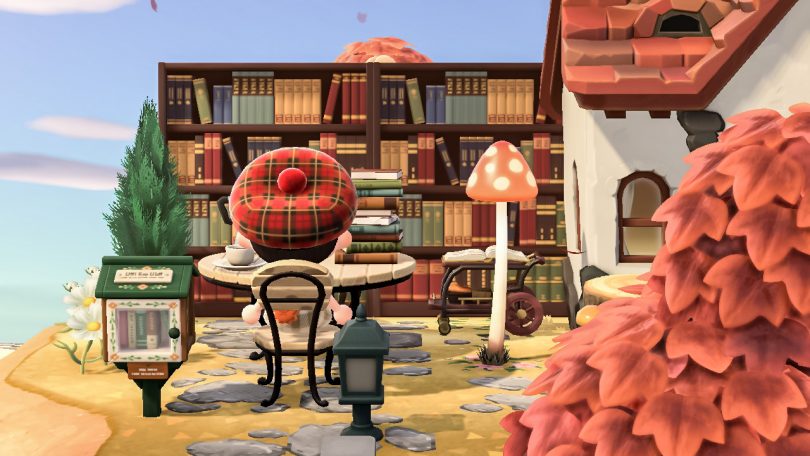
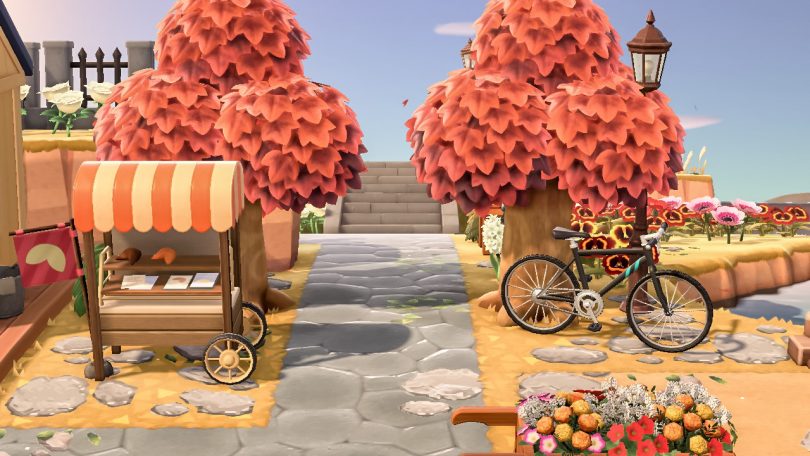
The Library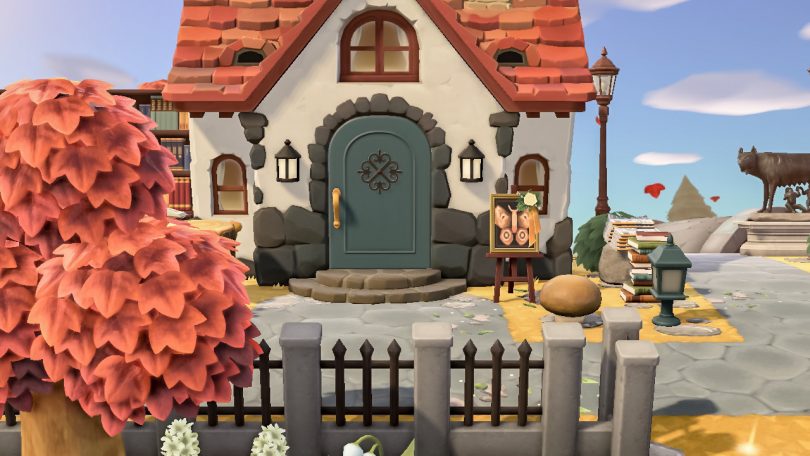
The Farm and Orchard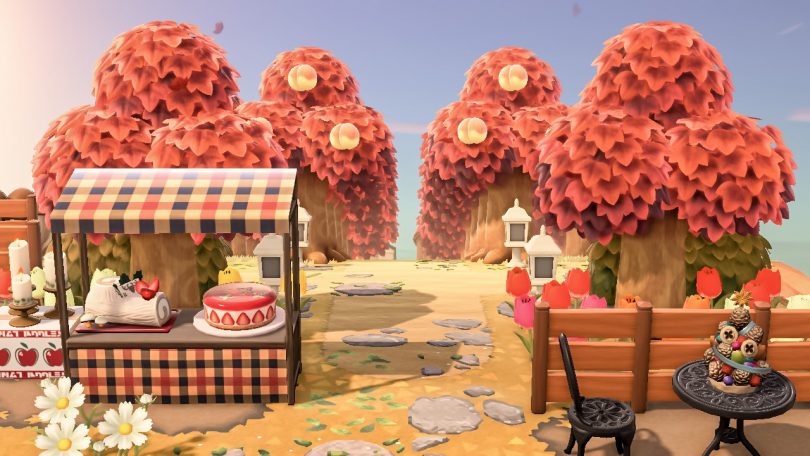
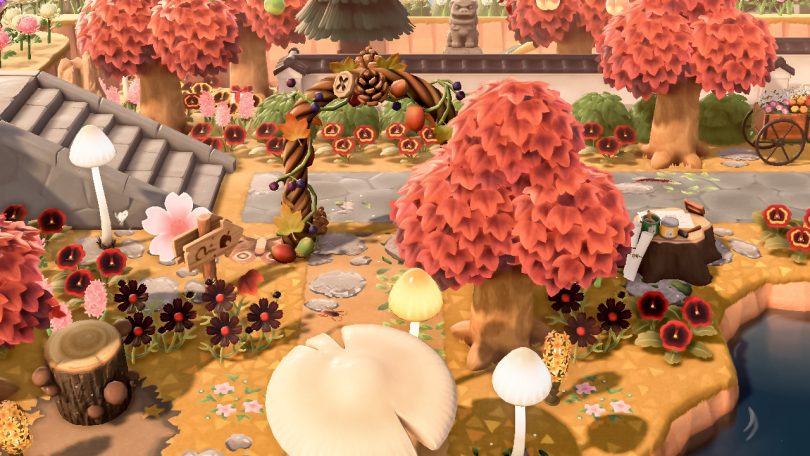
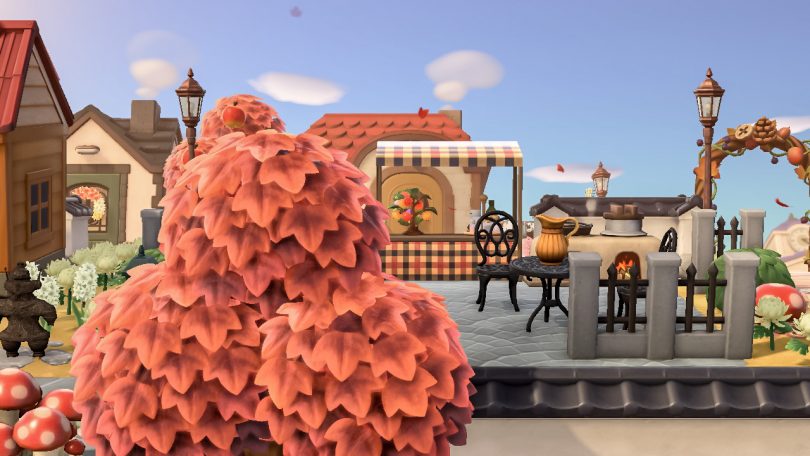
Around Town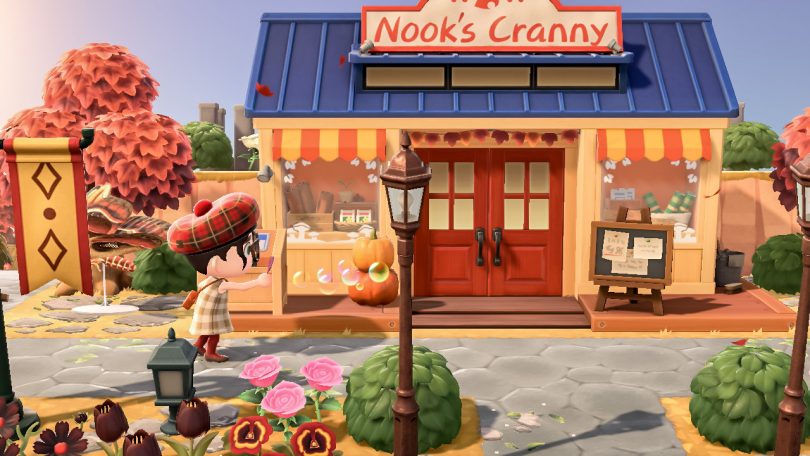


I had a dream that I could mod Animal Crossing to make my own flowers and furniture and I woke up very excited about it before I realized it wasn’t real. I miss the exotic and regal series sets! Adding those back in would be step one. Instead, I keep opening up Blender, thinking I should figure it out and expand my Sims modding capabilities, but I’ve been sticking to floors, walls, and recolors for now. And making mods for Stardew Valley, because that’s well within my capabilities (pixel art and coding). My youngest wants to be “an artist, YouTuber, and modder” when he grows up. (At first I thought he said “model” and I thought that was an interesting, unexpected choice.) Right now I’m in charge of making and/or finding, and then installing mods for all three kids, but I’m trying to encourage them to do more of it on their own. We do a lot of customizing for personal use and I want them to see how math and coding intersects with art in a fun, satisfying way. 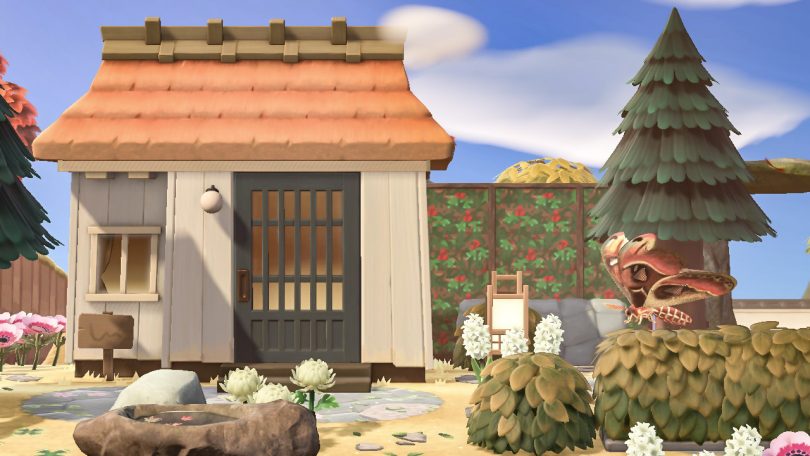

OK, Bye! 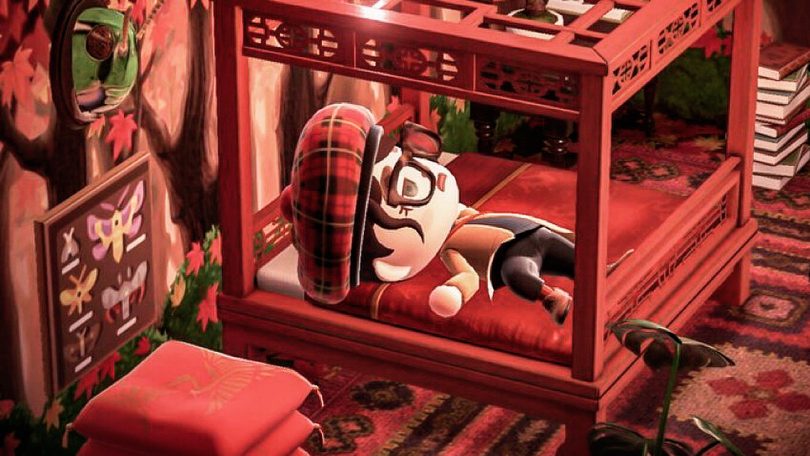
© 2020, published by Making it Lovely as My Lovely Animal Crossing Island Fall Tour | No comments | This post may contains affiliate links; I will be compensated if you make a purchase after clicking on my links. The post My Lovely Animal Crossing Island Fall Tour appeared first on Making it Lovely. Can we get behind putting the TV back in armoires yet? Because sometimes it’s a good solution (she says as she thinks of the troublemaking pair of kittens that want to climb the face of our television). I like the scale and sort of 70s/Jacobean/Tudor style of this one, but I’d paint it black. Let’s do a living room design! Because I wanted to design something with a dolphin mirror and that delicious velvet sofa. 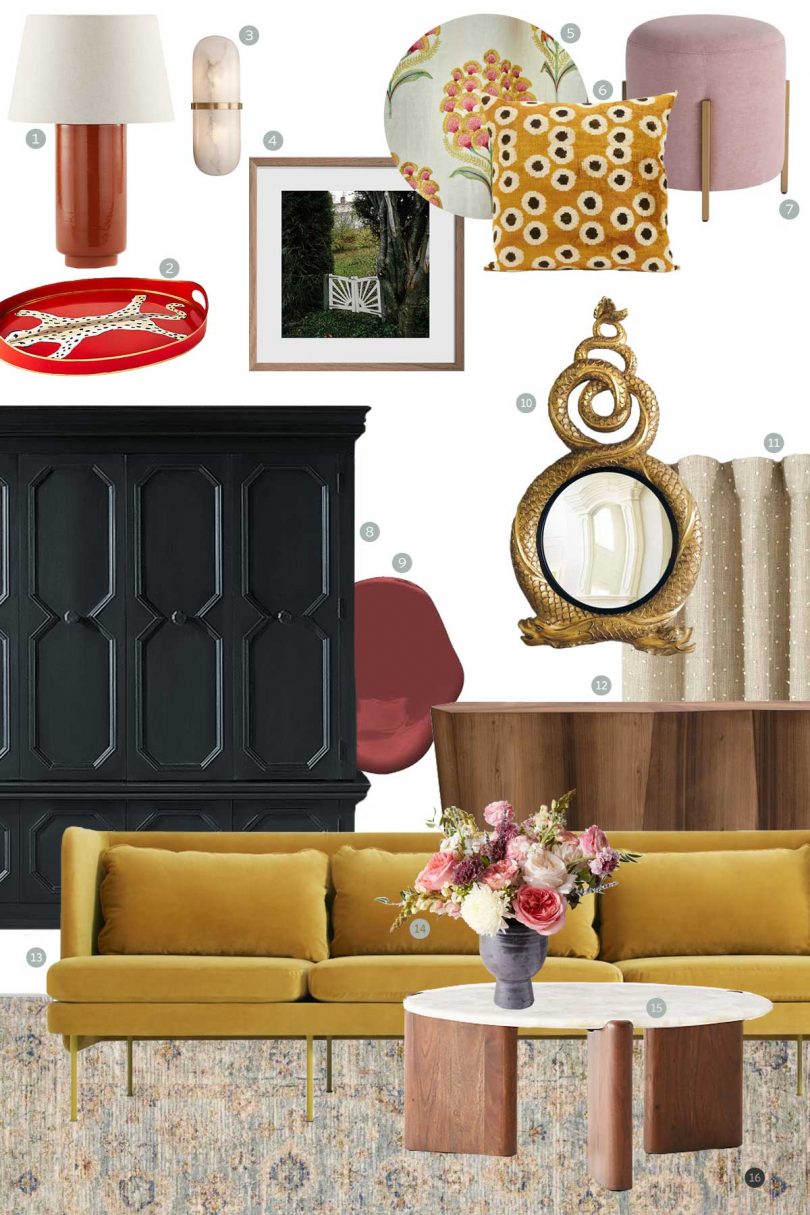
*Eh? Eeehhhh? (I’m nudging you with my elbow and waggling my eyebrow.) I never left Team TV in the Armoire. Not in every situation, since flat screens are so unobtrusive now, but I do like a big honkin’ piece of furniture to anchor a room. 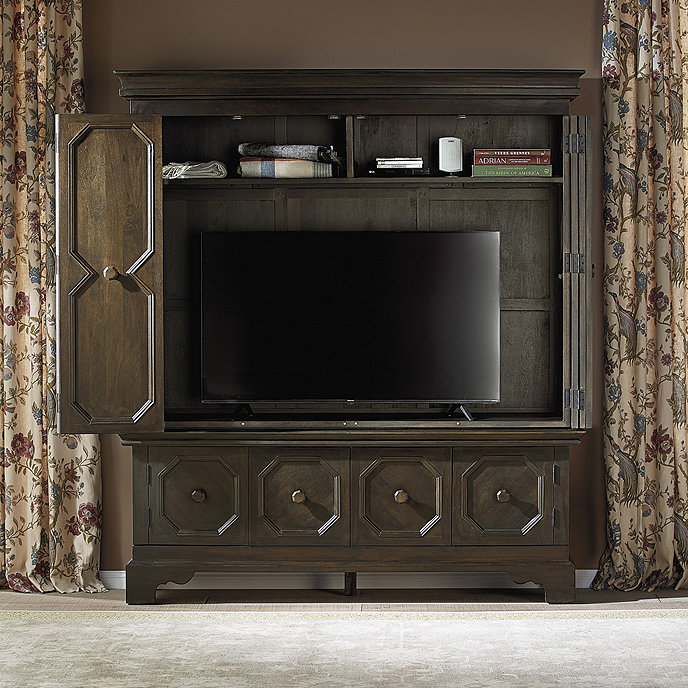
© 2020, published by Making it Lovely as 70s Chic TV Hideaway | No comments | This post may contains affiliate links; I will be compensated if you make a purchase after clicking on my links. The post 70s Chic TV Hideaway appeared first on Making it Lovely. I’m turning 40 this month (hooray!), so this is my *snap my fingers new wardrobe* birthday wish list. I don’t need any of it, but ooooh do I want it all. I feel good about my age, and I don’t care much about birthdays, but I do miss feeling like I look nice. I stopped dyeing my hair sometime before Christmas, and I’ve liked seeing my hair change (I’ve had grays since I was 17 but have dyed off and on since I was 13 — every color but green and blue). I like the sparkly strands, but not the ombré of previously dyed hair that wants to go brassy. Coincidentally, that’s also around the last time I had a haircut and long hair is not for me. I’m not ready to go to a salon, and I know I’m picky enough with a professional haircut to not subject Brandon to my scrutiny of a home haircut. I figure I’ll let it grow until I can do a big chop and donate to a place that accepts dyed hair. Lots of crown braids and Gibson rolls in the meantime for me. So it’s completely reasonable that while self-isolating during a pandemic in which I see only the people I live with, I just want to spend (adds up totals) oh, at least $2500 on pretty new things to wear? I want to look nice! It’s for my birthday. Let me pretend and be self-indulgent because after all, that’s what blogs are great for. I could be confined to my house for a milestone birthday in elegance. 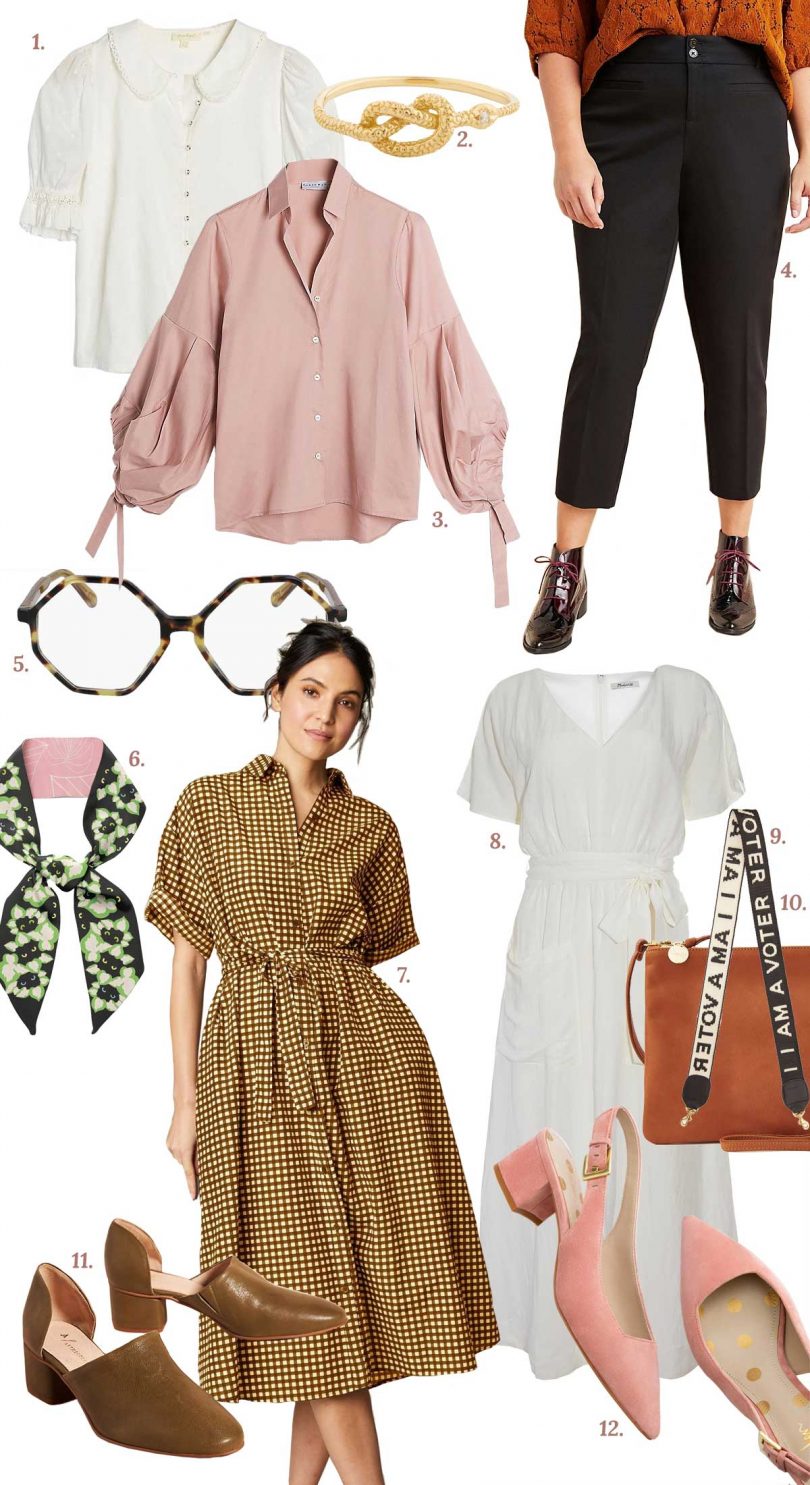
© 2020, published by Making it Lovely as A Birthday Wish List Disguised as a Style Post! | No comments | This post may contains affiliate links; I will be compensated if you make a purchase after clicking on my links. The post A Birthday Wish List Disguised as a Style Post! appeared first on Making it Lovely. “Where are those chairs from?” It’s a question that’s asked every time I share my dining room. I’m happy to share, but unfortunately, nobody is selling them anymore. 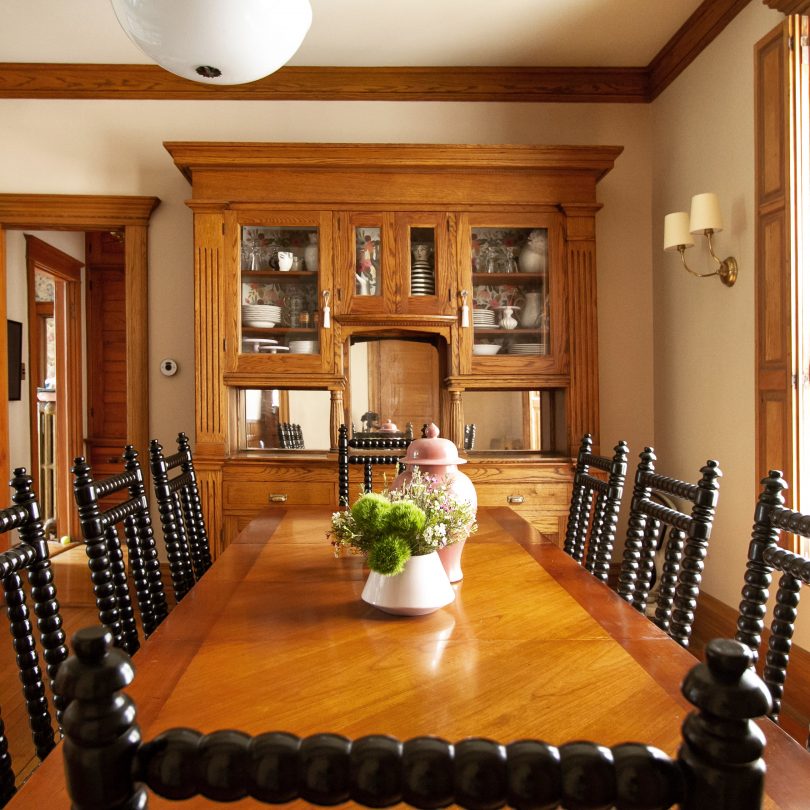
We used to have Industry West’s Marais A chairs at the table. We still have them stored in the basement — they’re stackable and we use them when hosting for Christmas or other large gatherings. 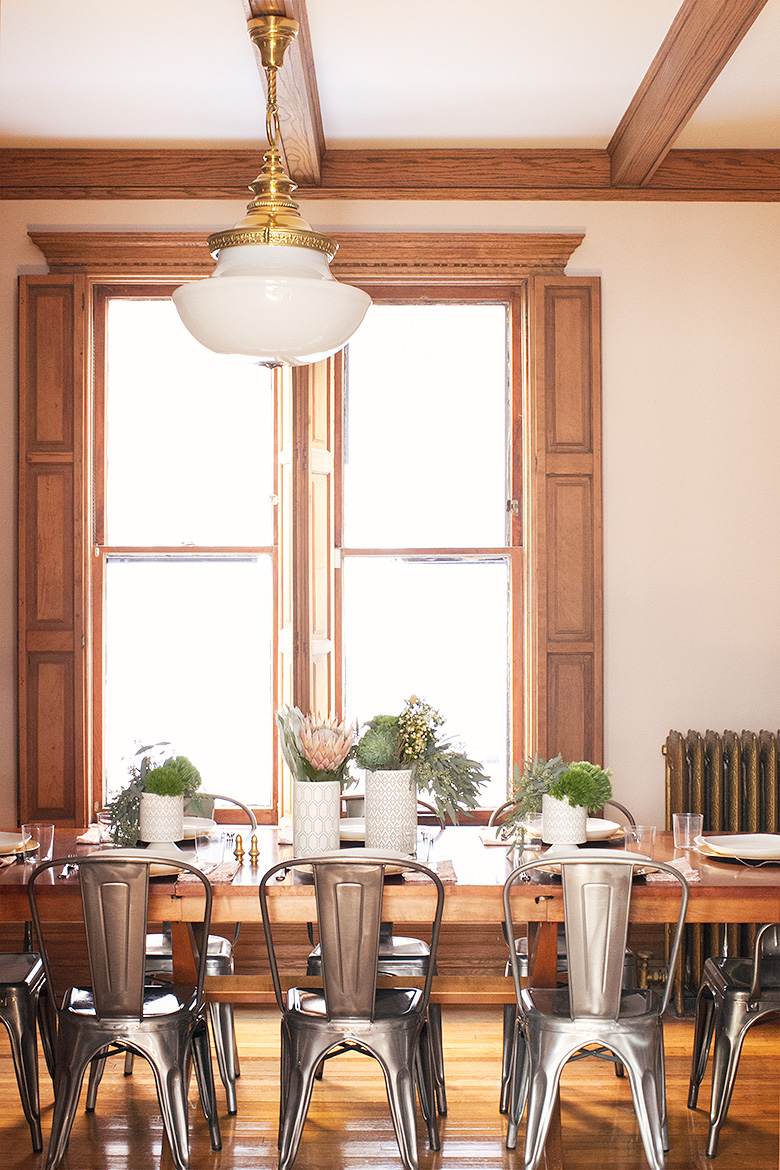
They’re great chairs and hold up beautifully, but I liked them better in our previous house. I wanted a different look here, and it took a while before we were ready to buy. A full set of 8 dining chairs is expensive! Just as we were ready to purchase and I had decided on Abacus dining chairs by Noir, they were discontinued. I was almost able to get them at a great price because of it, but there weren’t enough left in stock. Next on my list was Redford House’s Abigail chair, but then I came across Baxton Studio’s Heather chair and those are the ones we have in our dining room. 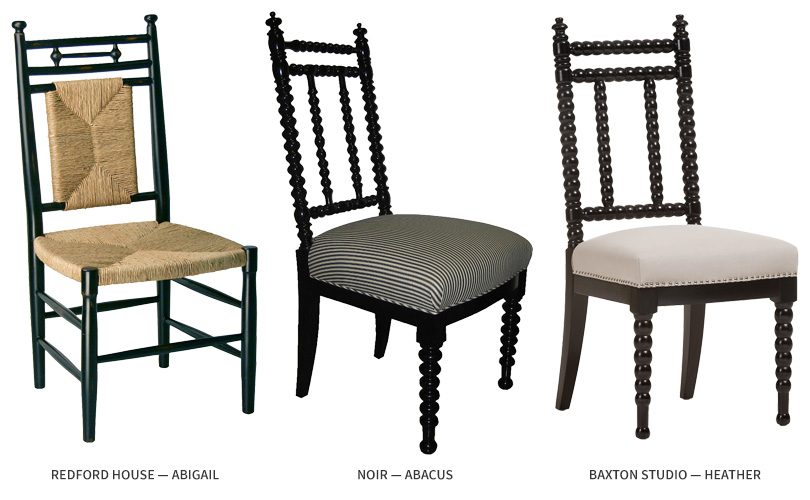
The Abacus and Heather chairs are so similar because they’re both reproductions of antique spool chairs. Below are examples from 1st Dibs (chair 1, 2). 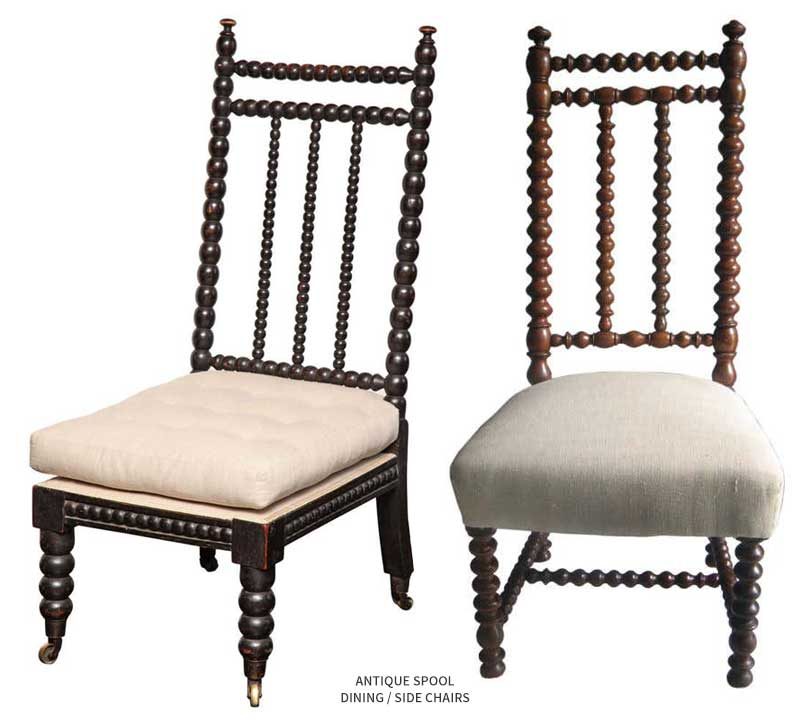
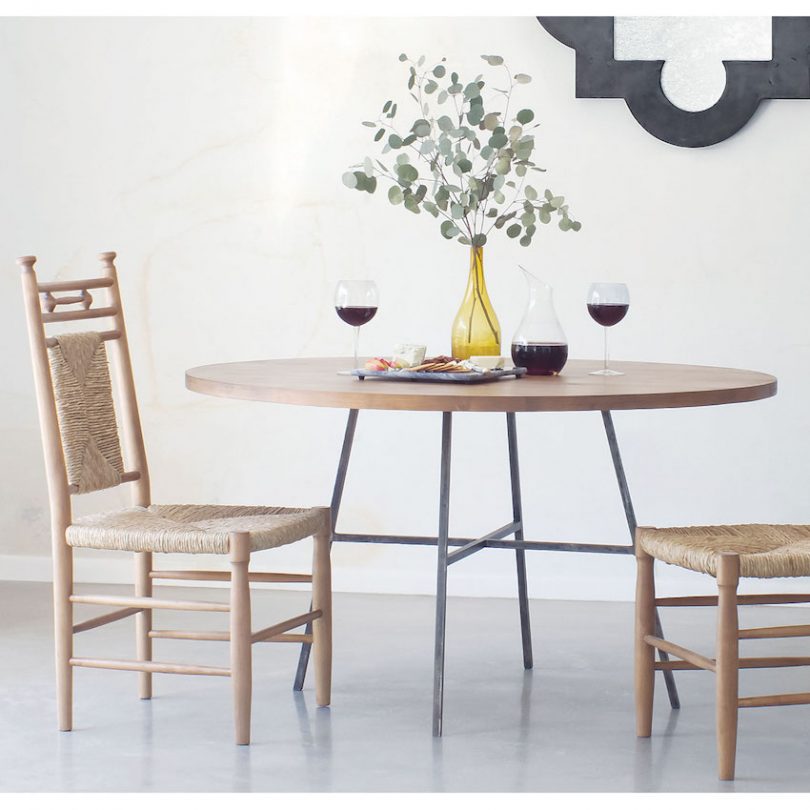
So where can you buy them now?Well, I started sourcing for this post in hopes of finding similar styles, and they’re just not out there. The closest right now would be Ballard Designs’ Livia Spool Chair which has similar elements and is very cute. The Redford House Abigail chair I had initially considered is still in production too. I’m not aware of anything more spot-on, but if this were for a client, I wouldn’t hesitate to recommend either. 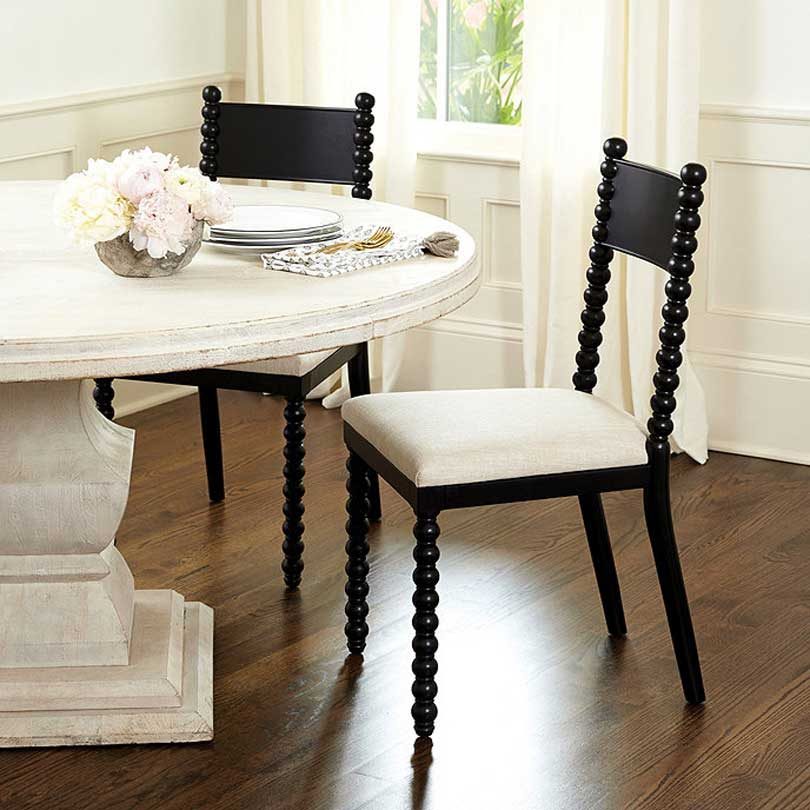
Going vintage/antique is another good option for simimlar chairs, and a coat of black paint on an interesting shape goes a long way. Phrases to search for online in this case: spool, spindle, bobbin, turned, barley twist, Jenny Lind. Spool is the most accurate term, but all of those have the potential to turn up something similar. Searching for other historical styles can be helpful (they’re sometimes mislabeled). Try “side chair” or “dining chair” and Jacobean, Georgian, colonial, federal, empire, regency, or ladder back. And whatever chairs you have, if the seats are upholstered I highly, highly, highly recommend getting seat covers to safeguard against kids or other particularly messy people in your life. These are the ones we have (you can see the straps on the chair in the center below). The fabric would be so gross on the kids’ seats if we didn’t have the covers on. 
© 2020, published by Making it Lovely as Spool Dining Chairs | No comments | This post may contains affiliate links; I will be compensated if you make a purchase after clicking on my links. The post Spool Dining Chairs appeared first on Making it Lovely. Our dining room sconces are in, and the additional light is room-changing. It only took me seven years to finally add the fixtures I always felt should be there! 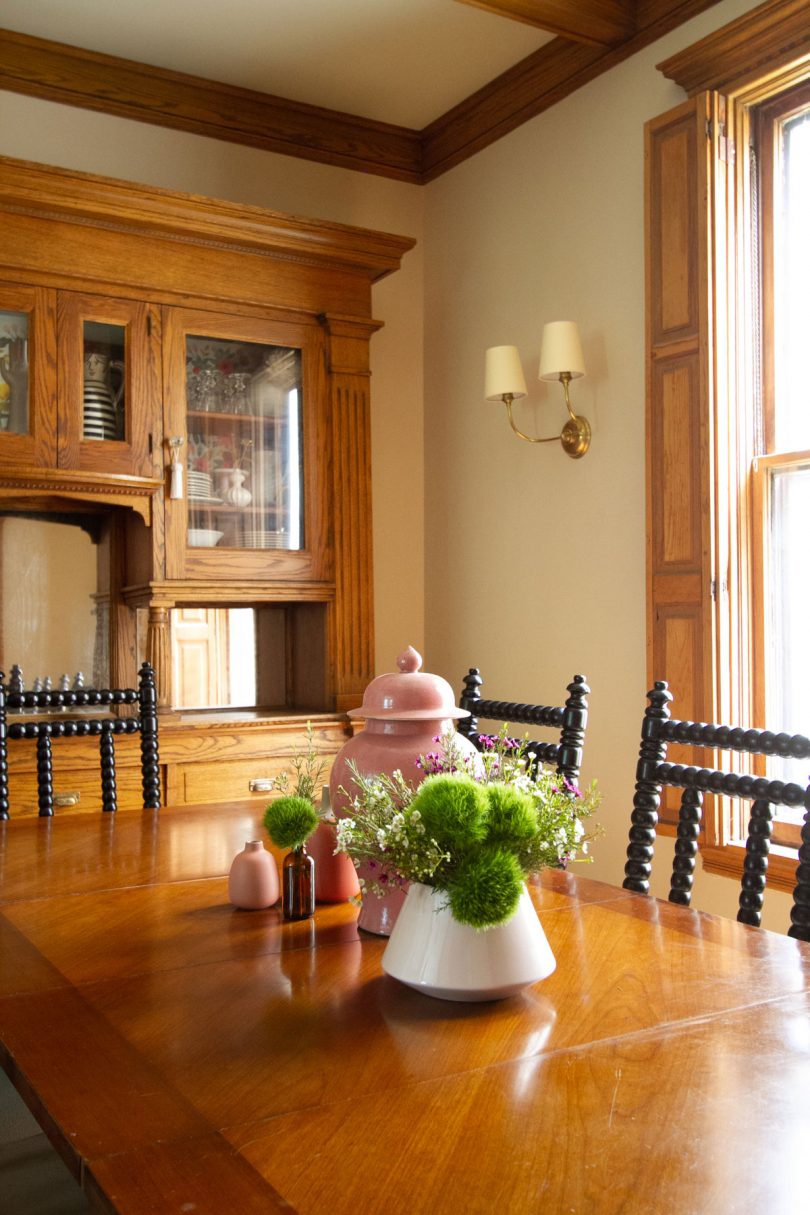
The room is pretty, but she is plain. I’ve liked that because I could add any tablecloth, set the table and decorate for parties in any color, and it would work. But ho hum. A little boring day-to-day.
I was looking at some of my favorite bugs (because that is the kind of thing I like to do) and inspiration struck. Apantesis incorrupta shall be my muse! For something! For… the dining room? Yes! The garden tiger moth (Arctic caja) has similar markings with more vivid coloration and so is also serving as inspiration. What to do first? Paint the ceiling orangey-red of course. 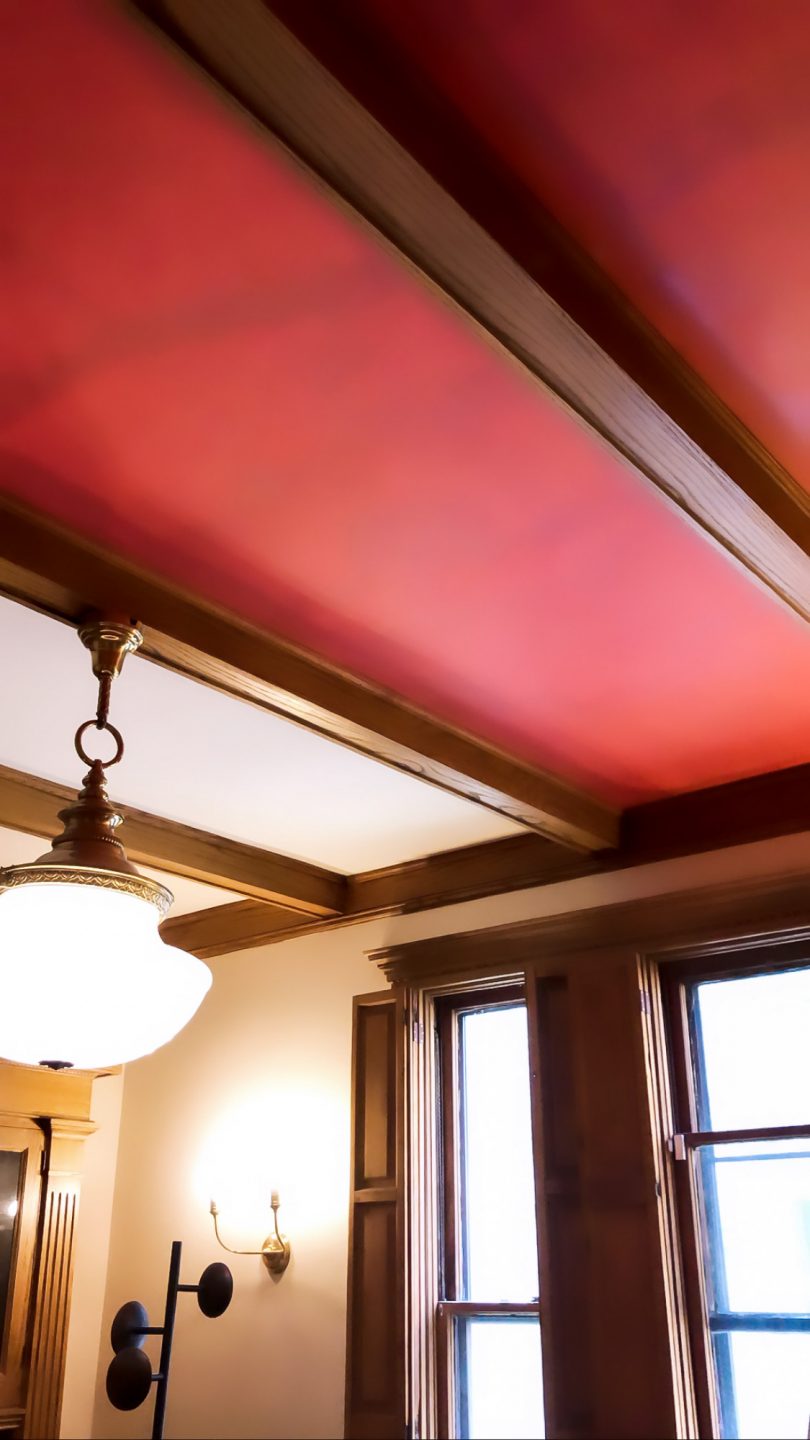
Want to see where this is going? I have a plan. Sort of. 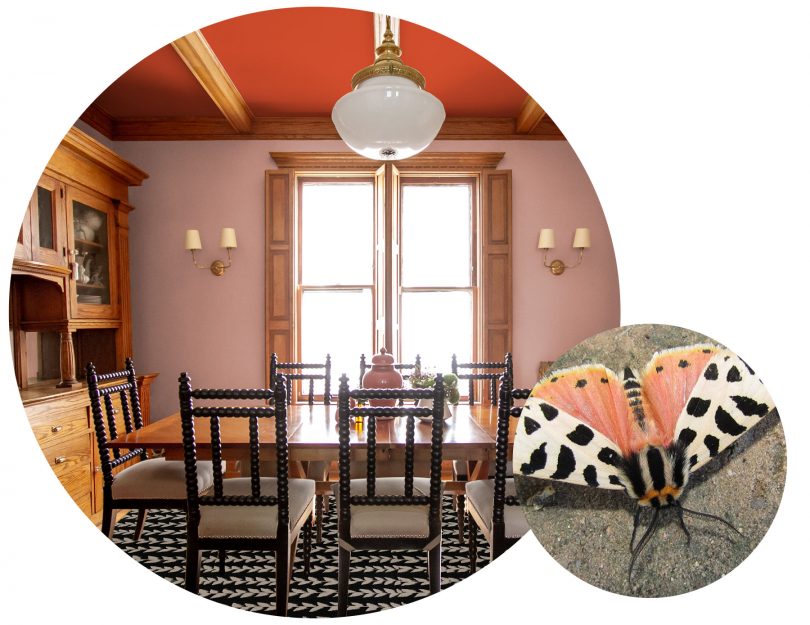
The red ceiling: yes. Walls: a deeper, cooler pink than the subtle beige/pink we have now. The wood stays unpainted, the furniture all remains unchanged. Some art and a new wallpaper backing in the hutch? A lamp for the gateleg table on the other side of the room? I’m letting the room come together as I go. The floor is starting to show some wear and could benefit from being covered. That rug above is indoor/outdoor and affordable, both good things for a rug in the dining room, but I am still looking. It’s a little on-the-nose inspired by the wings. The entry, dining room, and double parlor are all fairly open to one another and I’m always thinking about how they work as a whole, so I would love something old that works with my entryway runner. I did have a hand-me-down rug that I loved and had hoped would work, but the scale was all wrong. 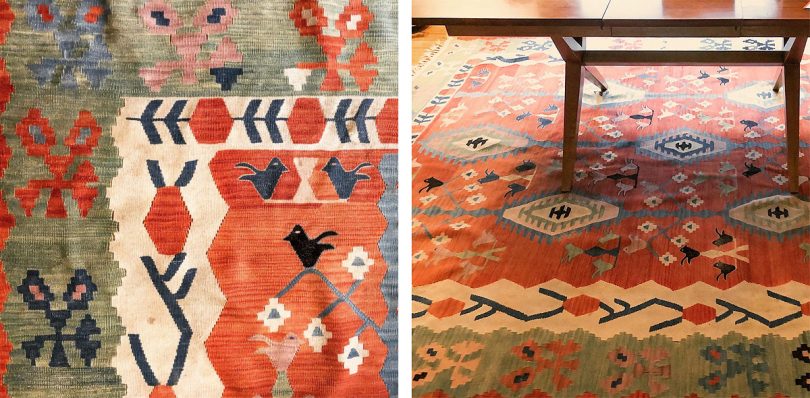
The dining room and entry are nearly the same color, with the library coming in a paler shade of pink. When I paint the dining room walls, I may end up wanting to repaint the entry at some point too, being careful to avoid anything that in combination makes the first floor look like Easter eggs. A muddy green or toned yellow could be right — something close to the value of the woodwork to lessen the contrast from room to room. I came across this paint palette from Atelier Ellis the other day. The colors align perfectly with what I’m going for (just add that red from the rose petals) and my home’s color palette as a whole, but I was also happy to see more moth inspiration! I’m not the only one looking to the moth side of lepidopterans. 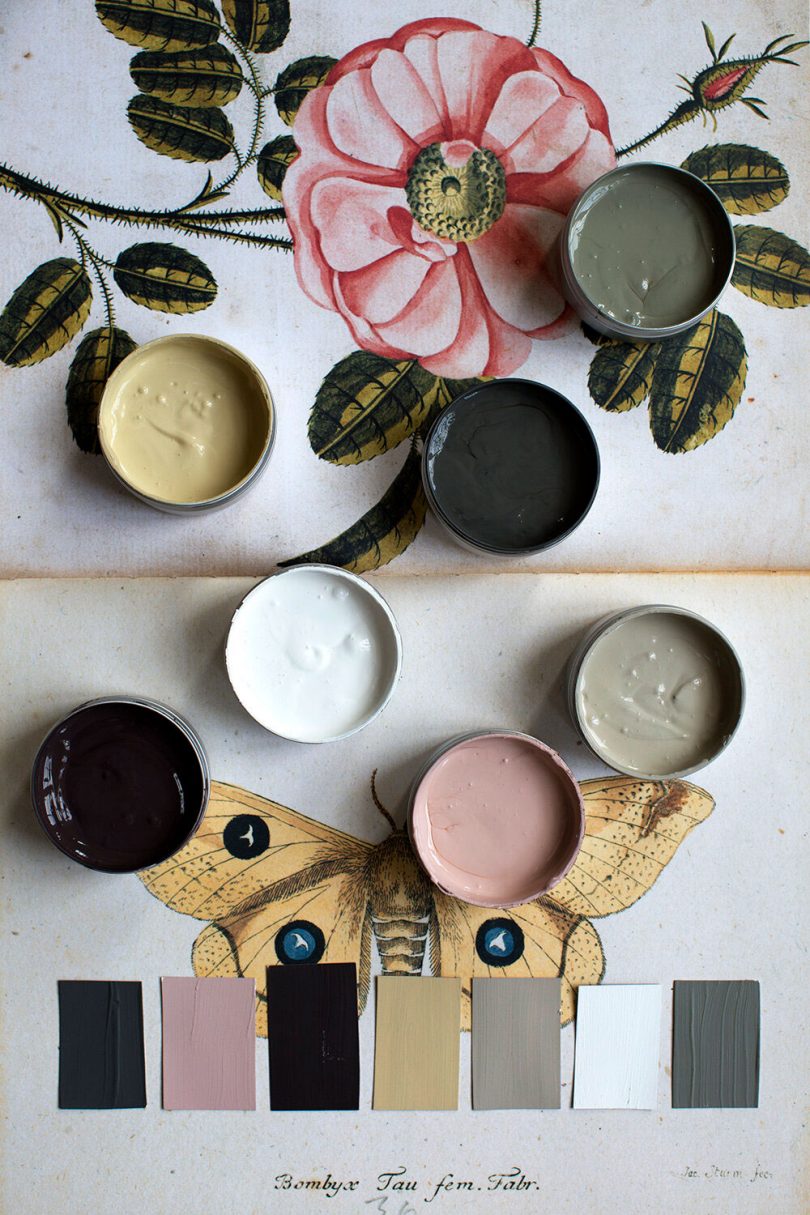
Apantesis incorrupta photo copyright © 2017 Matthew Priebe; BugGuide © 2020, published by Making it Lovely as A Moth-inspired Dining Room Design | No comments | This post may contains affiliate links; I will be compensated if you make a purchase after clicking on my links. The post A Moth-inspired Dining Room Design appeared first on Making it Lovely. The title says it all. But if I could have fit it, I would’ve also included: And This Easy No-Sew Alteration Makes it Even Better!I’m busty and the puff sleeves on this dress were not doing me any favors. I loved everything else about it though! Midi-length with a defined waist, summery cotton eyelet, and pockets. I’m not an experienced seamstress but I thought that maybe I could create cap sleeves or get rid of them altogether, but then I realized I could just snip the elastic and change the silhouette. Easy! 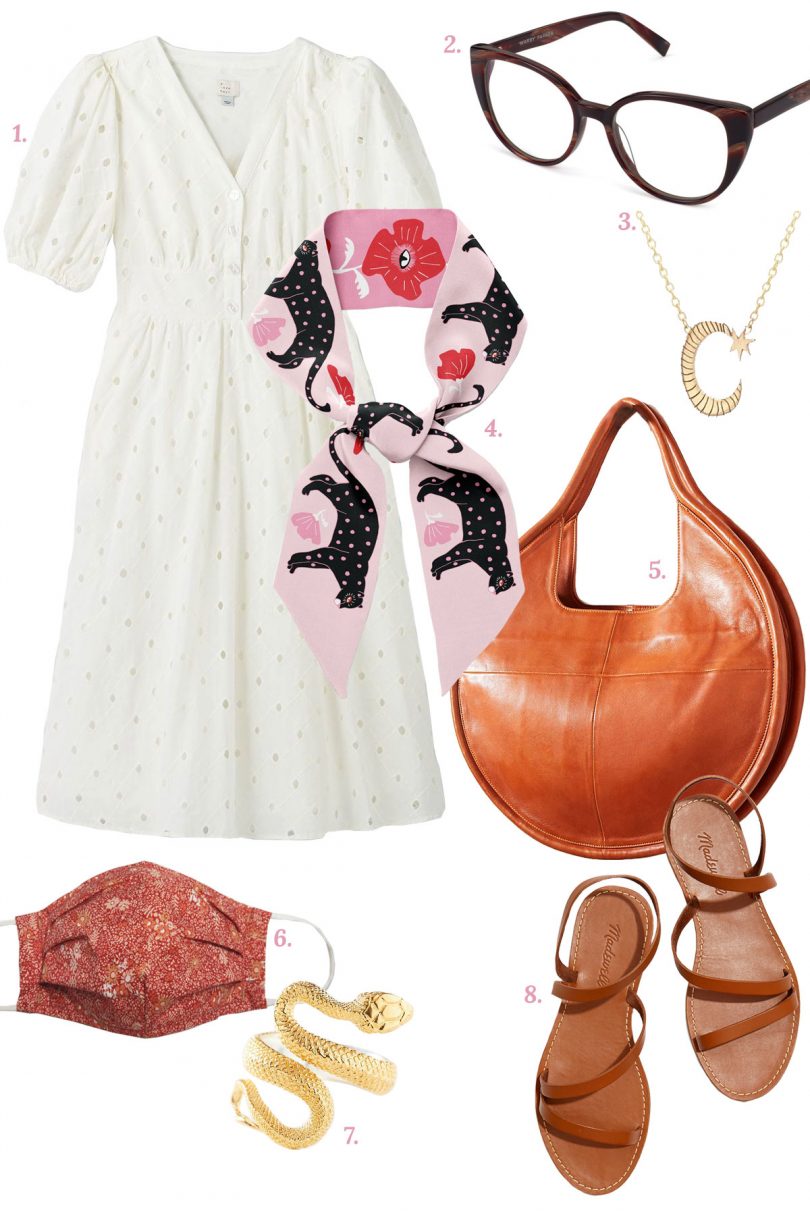
© 2020, published by Making it Lovely as I Love This $28 Dress | No comments | This post may contains affiliate links; I will be compensated if you make a purchase after clicking on my links. The post I Love This $28 Dress appeared first on Making it Lovely. |
 RSS Feed
